Blog

2015 San Diego Triathlon Challenge: Help Us Support CAF

CAF2015-flyer

Dine at BeachFire  between 2 to 5 PM on September 20 and 20% of the proceeds will go towards our team fundraising goal for CAF. We will also be holding a silent auction during the fundraising event with all proceeds going toward CAF.

You can provide people with physical challenges with the tools necessary to find success in sports — and life!

Directions to BeachFire

204 Avenida Del Mar – at Ola Vista
San Clemente, CA 92672

ABOUT TEAM RAUSCH PT

On October 18, Rausch Physical Therapy will be competing in the San Diego Triathlon Challenge, which helps raise funds for challenged athletes around the world. Our team is made up of local CAF athletes, Rausch PT staff and patients.

You can learn more about Team Rausch PT and make a donation to help us reach our fundraising goal by visiting our team page: Team Rausch PT Team Page.

[button link=”http://caf1.convio.net/site/TR/2015SDTCEvents/General?company_id=1060&pg=company&fr_id=1050″ size=”small” color=”blue” align=”center” target=”_blank” ]DONATE NOW[/button]


1050804_2711121459525107

ABOUT CAF & San Diego Triathlon Challenge

Established in 1997, the Challenged Athletes Foundation (CAF) recognizes the athletic greatness inherent in all people with physical challenges and supports their athletic endeavors by providing unparalleled sports opportunities that lead to success in sports — and in life.

The Aspen Medical Products San Diego Triathlon Challenge is one of the most highly-regarded and motivational events in the triathlon world. Since its first event 20 years ago, the Tri Challenge has been instrumental in raising the funds that have allowed more than 9,500 challenged athletes around the world to make it to the starting line and inspired a new generation to realize they have no limits.


Proper Pitcher’s Hip Rotation and How to Get It


Remember that game Twister? Every time that spinner landed on a new color, you were forced to reach your hand behind your back, underneath a leg, and across the board, all while trying not to fall. While incredibly entertaining, this silly game can also be a valuable lesson about positional torques, balance, rotation and flexibility—especially when it comes to baseball.

Looking at the specific qualities to win this game can be related to the critical components of the throwing motion in baseball. Often times when assessing a pitcher’s mechanics, there’s a miss in relating the lower half to the upper half of the body.  It is crucial for a pitcher—no matter the age—to begin to learn the importance of max hip rotation in order to achieve full torque of the trunk and obtain maximal velocity through the pitch.

The Sling Shot Effect

The rubber band of a sling shot is wound up with so much tension so that when it’s released, a massive amount of kinetic energy hurls the rock (or projectile of your choice) forward. The pitching motion in baseball is similar in that the lower half of the body, starting with proper foot placement and maximal hip rotation, will create a buildup of kinetic energy through the trunk, shoulder blades, shoulder and finally release through the fingers.

Proper Hip Rotation and How to Get It

Without proper hip rotation, a pitcher’s hips will fly open, which creates torque at the elbow. To avoid this, we want proper hip rotation, which occurs when:

  • The hips are fully rotated just before the lead foot strikes the ground
  • The shoulders are closed with arm extended out into the cocked phase of throwing.

Proper rotation allows for maximal hip-to-shoulder separation, which in turns creates the most amount of torque and velocity possible. There are two specific keys to obtaining this position and preventing further stress on the arm, the lead leg and posture.

The lead leg

The lead leg must be relaxed from the knee down and have proper landing position. Proper landing position includes:

  • Toes pointing slightly towards the right-handers box (if a right-handed pitcher.)
  • The hips will remain closed until just before lead foot strikes the ground.
  • At this time they will lead their front hip towards the plate and really turn open the front hip at the latest possible time.
  • If done properly, the pitcher shoulder feel tightness along their oblique muscles, NOT their back.

Posture

When a pitcher transitions from early-stance phase to the cocked position, their posture can completely affect their ability to rotate through their hips and finish off a throw. For example, if a pitcher is bent too far forward when their foot lands, they will not have the ability to achieve full pelvic rotation, thus not allowing this maximal hip/shoulder separation.

The key for good throwing posture is to focus on balancing and creating extension or back-bending through the middle part of the athlete’s back. It has been statistically proven and correlated that the optimal position of posture is the thoracic spine slightly extended, slight lean towards the back leg, and non-throwing hip flexed up. Therefore, it is important to not allow early rotation of the trunk or shift the center of gravity towards the throwing arm, as both will cause the trunk and shoulders to “open early.” before the hips, and create abnormal stresses on the shoulder and arm.

Maintaining proper foot landing position and rotation of the hips will create the maximal amount of separation leading to good pitching mechanics and increased velocity. Posture is also considerably important and must be taken into account when looking at the ability to create this hip to shoulder separation.

Suggested Training and Exercises


StaffHeadshot-JonJonathan Meltzer graduated from the University of Redlands with a bachelor of arts in biology and a minor in physical education. Following graduation, Jonathan discovered his passion for physical therapy while working as a Physical Therapy Aide. After graduating top of his class from Loma Linda University in 2012 with a Doctorate in Physical Therapy, Jonathan began his career at Rausch Physical Therapy and Sports Performance. Jonathan’s goals are to identify limitations and treat his patients with the most recent and innovative techniques in order to maximize functional independence and obtain his patients’ individual goals.


Order Your Rausch PT Gear Today

Rausch Racing Gear

You’ve worked hard to get here, so make sure you’re 100% race ready with your own #TeamRauschPT gear.

To place your order:

  1. Click here to download the Rausch PT Race Gear Order Form (Please be patient as the form completely loads.) Order forms are also available at the Front Desk.
  2. Email your completed form to casey@rauschpt.net or drop off with Front Desk staff.
  3. You will receive a call/email response within 48 hours to confirm your order.


All orders must be placed by 12 p.m. on Wednesday, July 15, 2015.


Client Spotlight: Chris Powers

Client Spotlight | Chris Powers
Chris says his PT Lyndsay and Aide Ciena were instrumental in getting him back in rocking shape after his accident.
You never plan on ending up in the emergency room on your morning commute, but as Rausch Physical Therapy patient Chris Powers knows, you can’t plan for much in life.

Last September, Chris was on his way to work when a drunk driver slammed into his car, sending it flipping across the freeway until finally coming to a rest, upside down, blocking the I-5 freeway at 3:30 a.m. The other driver was arrested at the scene, and Chris was transported to the hospital with a possible C-5 fracture.

Luckily, Chris survived the crash with “only” some soft tissue damage to the neck, head and back. Though, if you ask him, the worst injury he sustained was terrible pain from his wrist to elbow—an utter tragedy for a guy who’s played the drums since he was 10 years old.

As life would have it, Chris was set to play a gig at a bar with his 80’s/90’s cover band One Hot Mess just one week after his accident. Determined to still rock it, he did his best to ignore the pain that made sitting at his drums nearly impossible and managed to bang out what simplistic patterns his injured arm could muster.

“I remember popping a ton of Advil before and after the show,” he said. “I was stressed out knowing that if I don’t get this arm fixed, I’m probably looking at having to hang up the sticks and find another drummer for the group.”

Rausch PT | Chris Powers
Chris Powers back behind the drums with his 80’s cover band, One Hot Mess.

So, after barely getting through that set, Chris set out to find a physical therapist who could help get him back into rockstar shape. On a recommendation from a co-worker he decided to give Rausch PT a try, with high hopes but low expectations ingrained from past PT-experiences.

However, Chris says that after working with Lyndsay for just a few months, the pain in his arm was gone. Now, less than a year later, he’ll be back up on stage this Saturday—this time at the House of Blues in Anaheim.

I’m where I’m at today thanks to Lyndsay. Her course of treatment and plan of action—designed by her and enacted upon by the aides—has given me the ability to feel better and do the things I loved prior to my collision.”

Like so many of our patients, Chris and his wife, Jeanine, also love running and hiking. While he jokes that he hasn’t yet crossed over into the ranks of “those who believe there is something good in running full marathons,” Chris also came into our clinic with the goal of lessening the pain in his neck and back so he could return to participating in 10K’s and Half-Marathons.

Chris and Jeanine Powers
Chris and Jeanine Powers hiking the Grand Canyon.

After some tissue work with his PT Lyndsay, a few sessions on the Alter-G Anti-Gravity Treadmill, and a great exercise program led by his aide Ciena, Chris says he’s back to normal. He and Jeanine have even registered to run the Zion National Park Half next year.

“I love drumming, I love running, and I love not hurting!” he said. “I have gone back to all of my passions since my treatment at Rausch PT. Lyndsay, thank you from the bottom of my heart for helping me get through what I needed to get through. My drums thank you, too!”

How to Get Race Ready in Five Steps

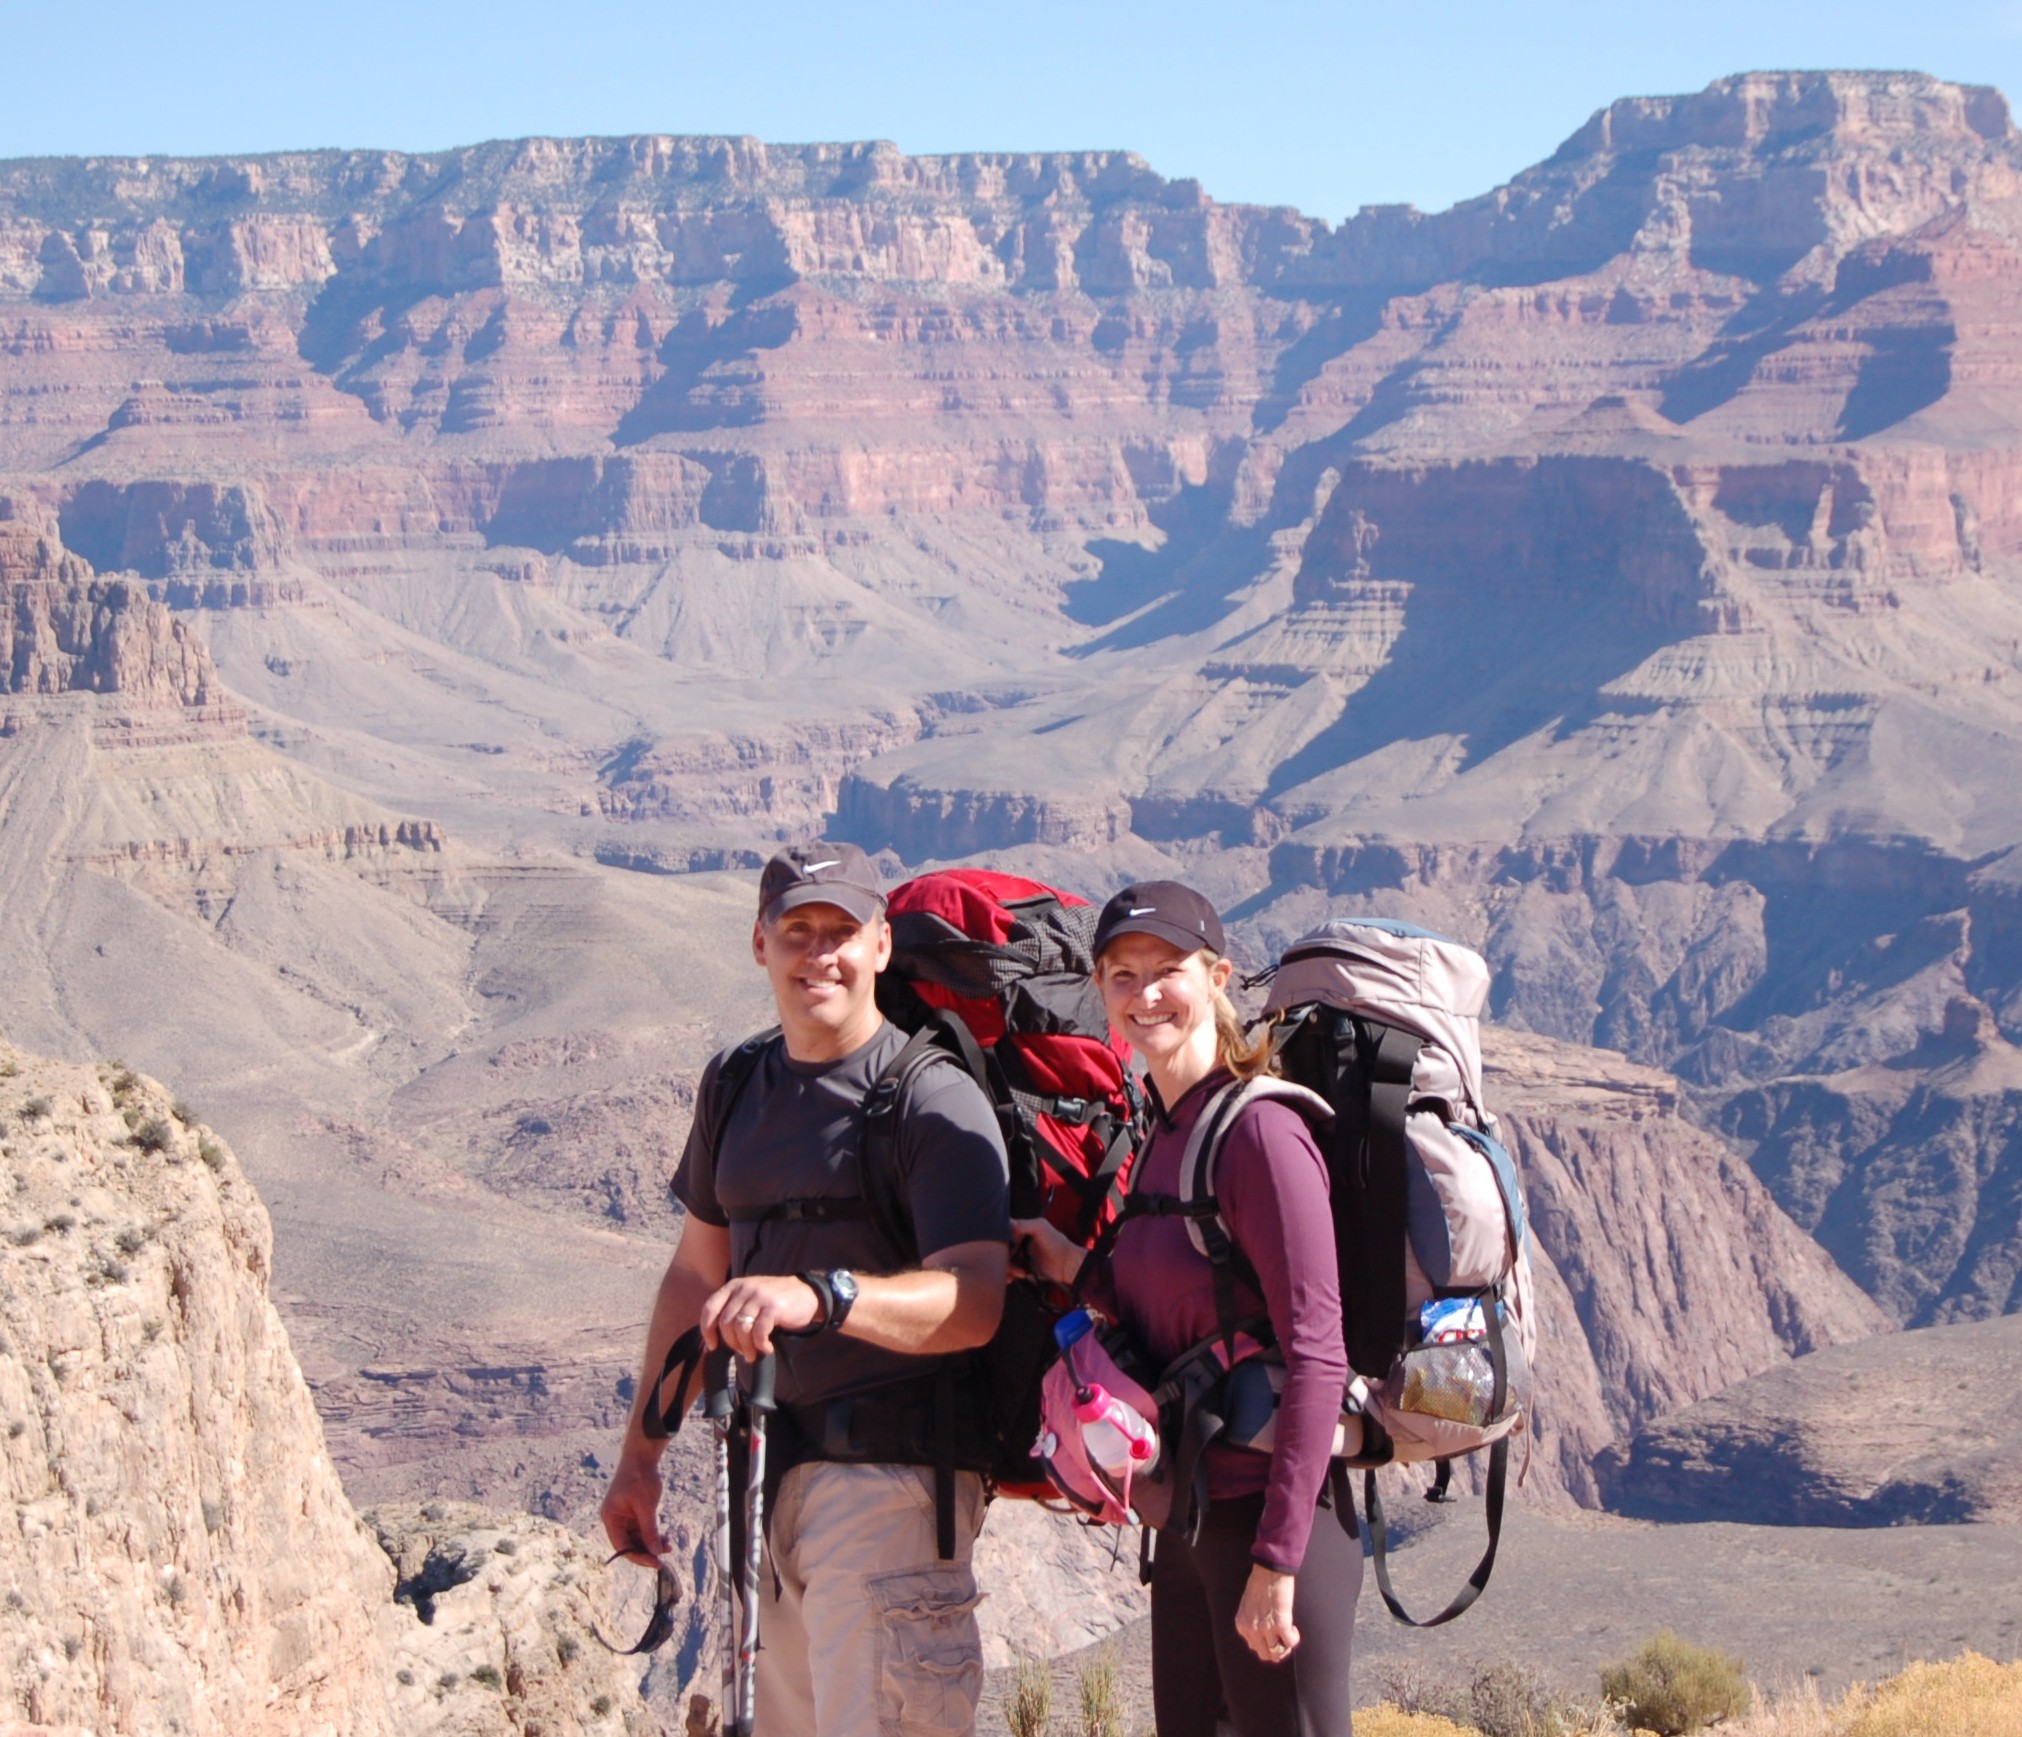
When was the last time you rolled up on race day feeling 100% prepared? Think back to your last big race, were you healthy, well-rested and happy with your training? There are so many factors to getting race ready; it takes a lot of planning to get it right, but it is possible.

Unfortunately, I normally work with athletes who don’t get it right. They end up hurt, bummed and sulking into our physical therapy office. The funny thing is, all I usually hear during that first appointment is, “I know better,” or  “Yeah, I felt this pain starting a couple months ago, but…”

Enough with the buts! Here are five easy steps to follow to make sure you get it right for your next big race. These steps work for any kind of race—running, cycling, triathlon, ultra or IRONMAN.

Step 1: Start training sooner.

Don’t rush into a long distance race without giving your body enough time to train to adapt. Your body is amazing and it will adapt to what you ask it to do; you just have to give it the right amount of stimulus and time. It’s pure physiology from there. Tough workouts break down muscle fibers and cause micro-inflammation in your tissues; the recovery time in between workouts allows your body to heal and subsequently get stronger each week.

However, this could be a lot to ask of your body if you decided to just go hard every day for a month in anticipation for a big race. That’s where the magical taper time comes in (See Step 5.)

Step 2: Pilates & Yoga count during your training.

Don’t skip core and flexibility training—those two are the keys to injury prevention.

Step 3: Love your tissues.

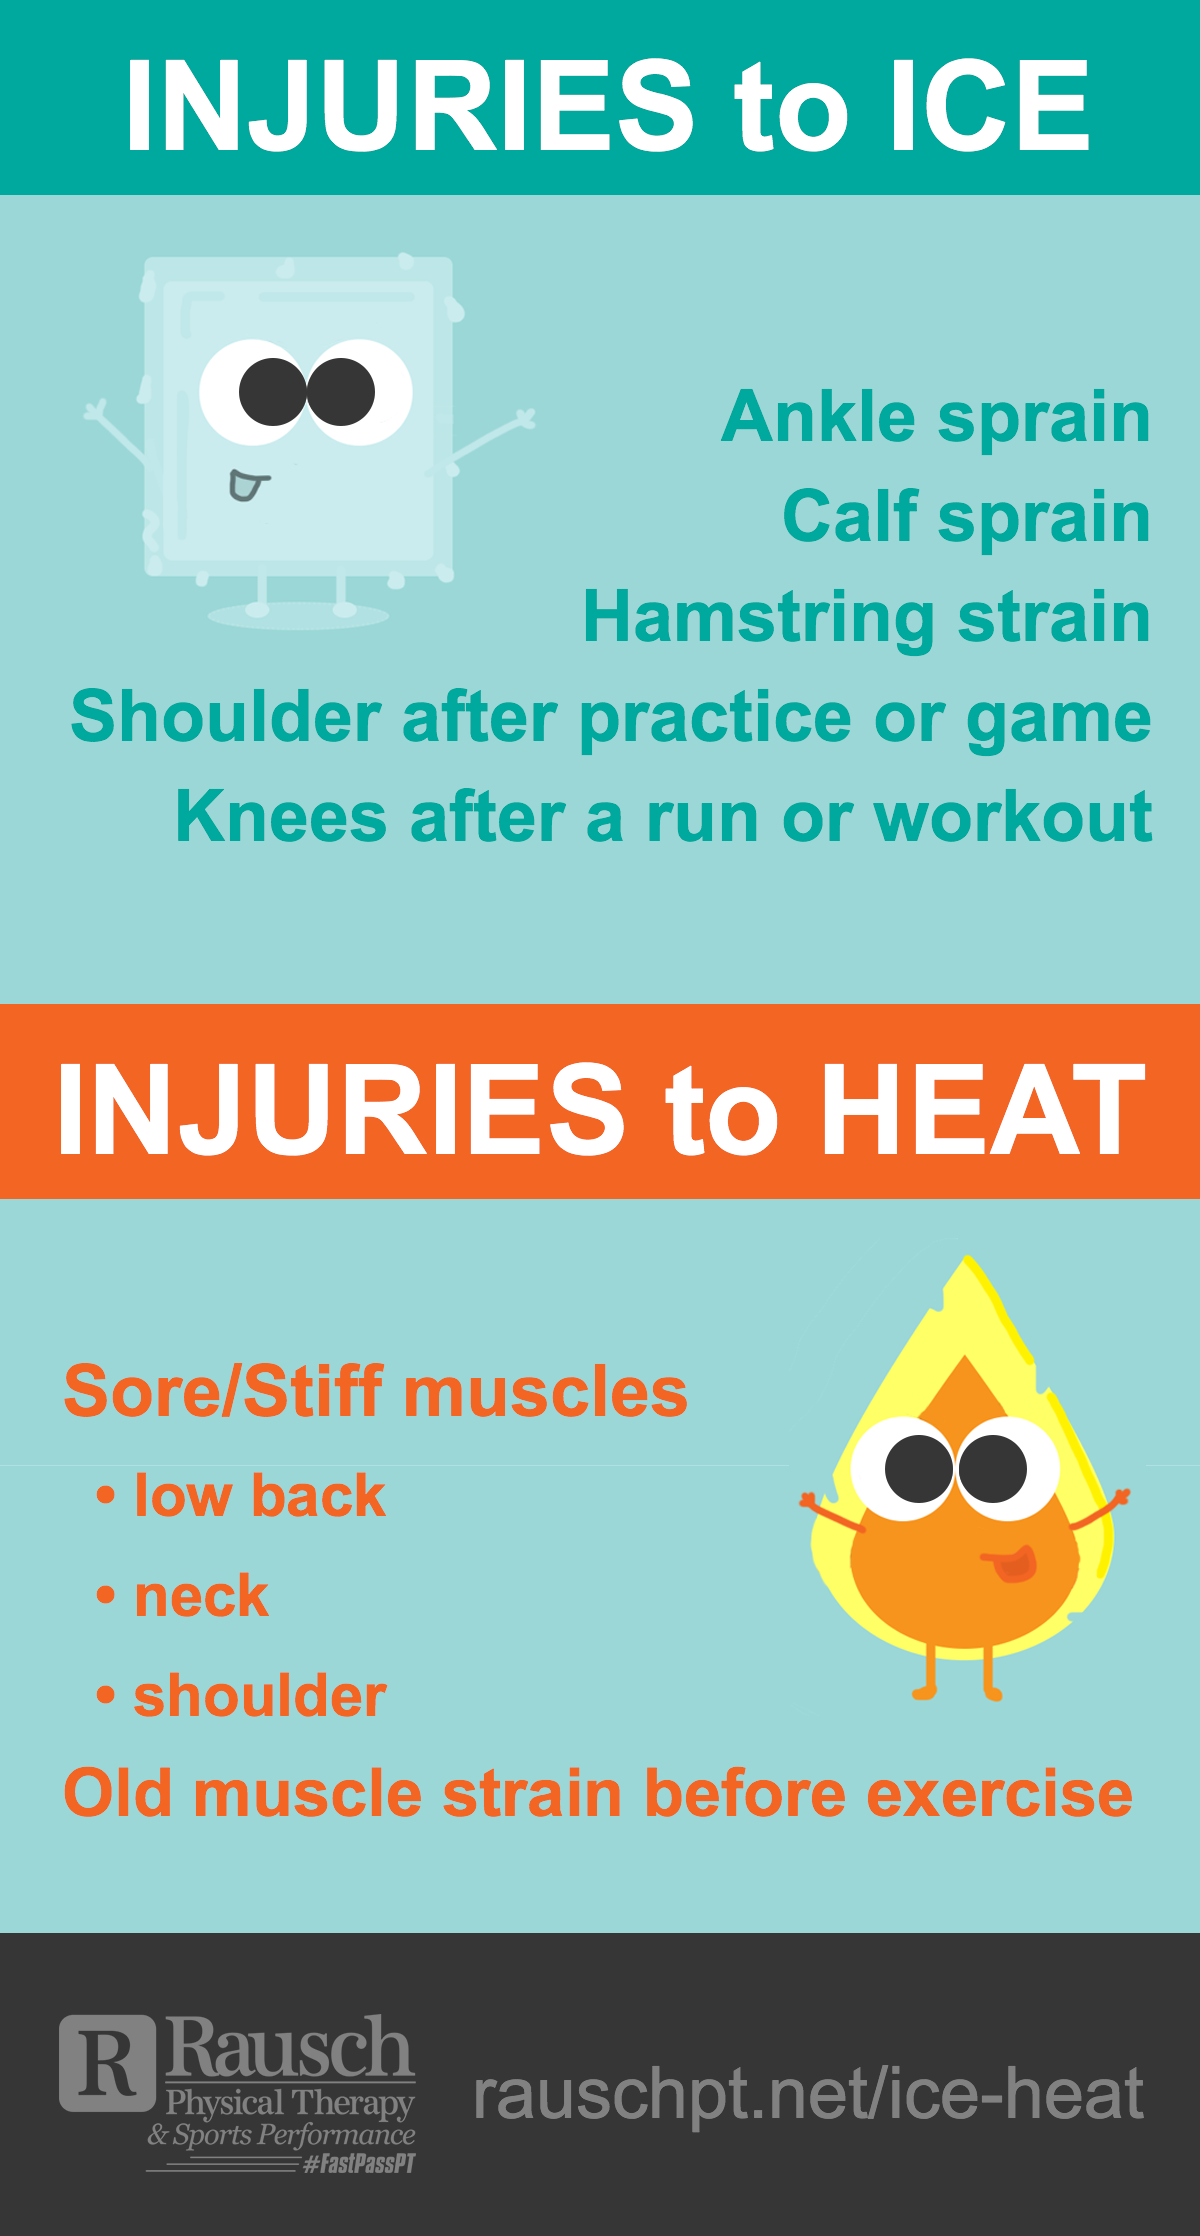
Stretch every night, use the foam roller and/or massage stick, and make regular appointments to get worked on by a manual physical therapist or therapeutic massage therapist.

Step 4: Recover.

In between every work out, use recovery tights, Norma-tech, Compex, hydrate, and eat like an athlete.

Step 5: STOP! Taper Time.

sports-massagePlan for a “tapering period” and build it into your training schedule. Tapering periods can be one week for short races and up to three weeks for longer races. Start to taper by decreasing the distances/time of your workouts, then use that saved time for MORE TISSUE WORK (See Step 3.) At minimum, get one massage during your taper period, but a couple would be better!

Benefits of training tapering

By scheduling in a tapering period toward the end of your training block, you give your body the final healing and prep time it needs before a race. However, this can only occur if you take advantage of the “extra” time you have because your training volume is lower. If you get massage work done, stretch, and use strategies to benefit from this tapering period, then your body will do its final recovery from all your months training.

Finding out how much taper time your body needs is a balancing act that you’ll get better at every year. Working with an intuitive coach can help, but remember that you are the only one your body talks to, so it’s up to you to listen to what your body is trying to tell you and act accordingly.

FINAL STEP: Enjoy the heck out of your race!

Once you get into the groove of well-planned training, core work, tissue work, recovery, and tapering, you’ll realize how much easier it is to be a successful racer.

All the best to your health,

Inbox-35061-messages-1987-unread


Kevin Rausch
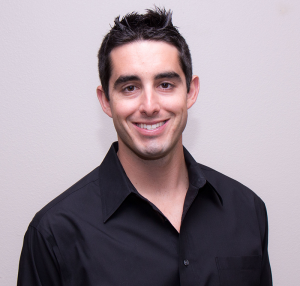
As the president and founder of Rausch Physical Therapy & Sports Performance, Kevin Rausch, PT, MPT takes great pride in the care of every single patient he treats. Kevin specializes in sacroiliac joint dysfunctions, running and cycling injuries, and return-to-sport planning for athletes. Since the first day he opened his clinic in 2006, Kevin has strived to provide the best in care, service and technology so as to strengthen his patients’ total body health and get them back to doing what they love.

Find Kevin on Google+


Finding the Best Kinesiology Tape for Your Body

You’ve seen it on professional athletes, you’ve seen it on weekend warriors, and if you’ve been to our clinic you have definitely seen it on our patients. So what exactly is that colorful, stretchy tape, and should YOU be using it, too?

Go into any sporting goods store and you’ll immediately notice that there are many different brands of kinesiology tapes out there (each claiming to be better than the other,) but what exactly separates the different brands? More importantly, how do you know which one will help best with your own recovery? To answer these questions, you first have to understand what k-tape is and how it works.

What is kinesiology tape?

The basic idea behind all kinesiology tapes is that they are elastic, which means that they stretch and move with you. This is in contrast to your average white athletic tape, which is more rigid and hence limits mobility. Most kinesiology tapes have a heat-activated adhesive component, which allows the tape to last a few days on clean skin without peeling off (even after showering!) Some brands offer cotton-based tapes with natural dyes, while others have more of a nylon component with artificial coloring. Some tapes come pre-cut, while others are sold in roll form. If applied properly, they all essentially do the same thing.

How does kinesiology tape work?

The most common ways to tape muscles or joints using kinesiology tape is to ask yourself why you are taping in the first place: are you taping to inhibit (relax/shut down)? Facilitate (activate)? Stabilize, control edema/swelling, or control pain? Each of these techniques requires specific placement and different tension application in order to perform their duty. While you can certainly YouTube “K-Tape,” “Rocktape,” “Kinesiotape,” etc. and find millions of videos on how to fix that pesky ITB issue or stabilize a knee cap that won’t stop moving, it’s best to have a professional teach you the specifics and application technique to receive optimal care and avoid the potential for other injuries.

You’ll probably notice that most brands have a swirl pattern of adhesive on the backside of the tape. Not only are they cool to look at, those swirly lines also serve a purpose. The swirls expand and recoil based on the amount of stretch a practitioner applies to the tape, targeting small receptors within the skin and underlying tissues to assist with healing. The amount of tension applied, the area of skin covered, and the directionality of how the tape is applied are all key factors in getting the best results.

Kinesiology tape DON’Ts

Now, some of the following may seem silly to some and have you saying, “Duh!” Nevertheless, I have to caution you on the following issues you can run into with kinesiology tape, as I wouldn’t bring them up if they haven’t happened to some poor soul in the past.

  1. Make sure you DO NOT have an allergy to adhesives. Most tapes are latex-free, however if band-aids and other similar products irritate your skin, k-tape may not be in the cards for you.
  2. Watch out for body hair. If the area you want to tape is hairy, it may be a good idea to shave or trim the hair before application. The tape will not stick very well if there’s too much hair, as it’s meant for direct skin contact. More importantly, remember this rule of thumb: sticky + increased activation with heat + a few days of activity = OUCH!! when it’s time to peel off.
  3. If the tape is itchy or causes more symptoms, remove it immediately. There’s no point in getting a rash or having increased discomfort.
  4. The tape has water repellent properties, so pat it dry with a towel after a swim, shower, etc. Due to the heat activation properties of the adhesive, I DO NOT recommended using a blow dryer to get the tape dry (Please refer to #2 for THAT outcome!)
  5. Lifesaver tip: the tape is de-activated with oils. So, if you find the tape painful to remove, grab some lotion, baby oil, olive oil, etc. and slowly peel back while applying the oil to the adhesive side of the tape.


So, which kinesiology tape is best for you?

When taped appropriately, most products will give positive results and can stay in place anywhere from 3-5 days or more, depending on location, activity, sweat factor, etc.  Again, in order to achieve optimal results and ensure you’re applying the tape specifically for your body’s needs, have a professional teach you first.  That being said, my recommendation for the best go-to brands would be either Kinesio Tape or RockTape. Both have proven to be super effective and tend to last longer than their other counterparts.


Lyndsay

Lyndsay DeFilippo PT, DPT, CKTP received her Doctorate of Physical Therapy from New York University in 2010. She’s a Graston Practitioner and a Certified Kinesiotaping Practitioner. Lyndsay looks at each injury as a constantly changing puzzle, which is only solved when her patient returns to what s/he loves doing. She enjoys helping with the full recovery process, which includes providing the education, tools and fundamentals to prevent re-injury and the potential for new injuries.

Should I Ice or Heat My Injury?

As a licensed physical therapist, I have been asked about ice versus heat many times. “When should I use ice?” “When should I use heat?” “What about IcyHot?” Then, there are the patients with pulled muscles who ask me, “Should I try to stretch it?” So, ice versus heat: which should you be doing? Well, it depends.

When to Use Ice

As a general rule, I advise using ice for any acute injury (injury occurring within the last 48-72 hours.) Ice will control the inflammation and prevent a muscle or joint from becoming so puffy and stiff that it cannot heal properly. Now, there are some people in the world of sports medicine who will argue against the use of ice because they believe inflammation is part of the natural healing response. This is absolutely true, however,the inflammatory process occurs immediately; so even the fastest application of an ice pack will not beat this natural inflammation.

Rausch PT Ice-Heat-InfographicApplying ice simply prevents the natural inflammation and swelling from becoming excessive and potentially causing secondary tissue death, which happens when there’s so much swelling that blood flow is completely blocked and healthy tissue becomes hypoxic. In clinical practice, uncontrolled swelling turns into pitting edema (a thick, putty-like substance that leaves an indentation when you press on the tissue.) This in turn leads to a stiff and—what I describe as,—“sticky” muscle or joint.

If your injured area is s hot, swollen or painful, ICE IT. Crushed ice is the best at reducing tissue temperature since it undergoes an actual physical change (from a solid to liquid.) But be warned:ice burn is a real thing, and I usually see this with the use of gel packs. To avoid ice burn, use a pillowcase as a barrier between the skin and gel pack. Ice for 10 to 15 minutes at a time. For a brand new injury, ice can be applied hourly.

When to Use Heat

For anything that is stiff, tight or sore, I typically recommend heat. This usually applies to chronic and ongoing injuries – the neck or low back pain after a long day of sitting, or shoulder pain after working on the computer. Heat increases blood flow, relaxes muscle and makes the other fascial tissues more pliable (i.e. the joint capsule.) Physical movement or exercise is actually the best way to increase tissue temperature because your body is warming from the inside. Yes, believe it or not, gentle exercise (walking, stationary cycling, etc.) will actually do more for you than a heat pack.

IcyHot and other topical heat rubs targets the superficial sensory nerve fibers to create the sensation of cold or heat, which can reflexively cause muscle relaxation by inhibiting pain. Does it help with healing? No, but it doesn’t hurt either. Know that there is no magic solution.

Whether you are using ice or heat, , ice and heat application should be part of an all-encompassing rehabilitation program – including soft tissue mobilization, strengthening and re-training of motor control and movement patterns.

Pulled Muscles: Stretch or Don’t Stretch?

First off, you should always do a proper warm-up and cool-down to help prevent pulling a muscle in the first place. However, if you have a pulled hamstring or strained calf, DO NOT stretch it. You should never try and stretch an already over-stretched muscle.. A muscle strain occurs when the muscle fibers are pulled beyond their ability to recoil properly, so they snap back. Yes, I know it’s tight, but if you pull on (stretch) it,  the muscle will only continue to tighten and add to the current strain.

Instead of stretching it, now would be an appropriate time for ice, and in a couple of days you can start heating, foam rolling and stretching. If you have any doubt, you can schedule an evaluation with your Rausch physical therapist who will  assess the severity of your injury and let you know  when you can start stretching it, as well as help you to strengthen the area to prevent straining the muscle a second time.


Jess-web

Jessica Snyder (PT, DPT, ATC, CSCS) received her Doctor of Physical Therapy degree at the University of St Augustine for Health Sciences – with an emphasis on orthopedics, movement science, and manual therapy. Jessica started her career as a Certified Athletic Trainer working with high school, college and professional athletes. She is also a Certified Strength and Conditioning Specialist (enhancing her ability to build custom strength, stability and performance-centered rehabilitation and return-to-sport programs) and Certified Natural Running Coach. Being a runner herself, Jessica specializes in running-related injuries, including the entire lower extremity. She is also passionate about treating headaches and neck/shoulder pain.

Client Spotlight: Ken Dewhirst

Rausch PT Client Spotlight - Ken Dewhirst
83-year-old Ken Dewhirst is at Rausch PT to strengthen his knee so he can dethrone the current U.S. Table Tennis Champion.
Rausch Physical Therapy & Sports Performance client Ken Dewhirst is gearing up for the comeback of his life. But to be the best, he needs to feel his best first.

“I need to be faster, stronger to be number one.” – Ken Dewhirst

Ken Dewhirst wants you to know that he can get around just fine, thank you very much. At 83 years old, Ken’s here at physical therapy for one reason only: so he can be number one.

Laguna Niguel-resident Ken is currently ranked in the Top 20 in the USA Table Tennis (USATT) Ratings for Men 80+. Ken was rated number four in the country but was sidelined by injury last year. However, Ken has recently made moves to start his climb back to the top, and his first stop? Rausch PT.

“I’m here because I want to up my level and get better so I can be the best in my age group,” Ken said. “I need to be faster, stronger to be number one.”

Ken grew up playing tennis, excelling in high school but eventually gave it up to focus on his college education. He and Rosemarie, his wife of 57 years, spent their days working, raising their children, and traveling the world. But when Ken retired at the age of 60, he knew he had to find something new to keep his mind and body active.

After doing a little research, Ken came across table tennis. He decided to give it a shot… and ranked in his very first tournament. Ever since then, Ken has been working with famous coaches and beating opponents half his age, all the while moving up the ranks.

WAYNE MAH, FOR THE REGISTER
Ken Dewhirst in 2009 moving at the speed of players half his age. (WAYNE MAH, FOR THE OC REGISTER.)

“His goal was to reach the middle of the rankings of all age groups,” biggest fan/critic Rosemarie said. “Well, he did that. So now we need a new goal.”

So what’s next on the list for this octogenarian? Dethrone the new kid on the block. At a spry 80 years old, George Braithwaite recently moved into the 80+ group, which has Ken chomping at the bit for a chance to prove himself. Ken says that while George plays at a higher level than him, he has to try.

“[George] is good. I’ll need to play a faster game against him.”

To get there, Ken knows he has to strengthen his knee to have any chance of beating the champ. He’s only visited Rausch Physical Therapy & Sports Performance a couple times so far, but he says he’s confident that his physical therapist Dustin is going to get him off the table so he can get back to the tables.

Visualizing Your Way to a Quicker Recovery

If you are an athlete, odds are you have at one time or another been sidelined by an injury. The frustration that comes with being unable to train and compete can lead to a loss in motivation and a longer recovery process. To combat this, athletes should learn to use visual relaxation and performance techniques and practice them diligently.

There are many forms of relaxation training that athletes can use to help accelerate rehabilitation after injury, including kinesthetic (progressive muscle relaxation), mindfulness (breathing techniques), auditory (listening to calming voices), hypno-relaxation (using hypnosis to induce relaxation, and visual methods (including imagery).

Visual relaxation methods to speed up recovery

  • Remembered imagery. Remember a pleasant and relaxing time in your life. Re-experience it. Become fully absorbed, focusing on what you see, smell, hear and feel against your skin as you visualize that calming scene.
  • Constructed imagery. Imagine a pleasant or relaxing scene in your mind. Step into the picture and experience the scene fully.
  • Hypnotherapy using imagery. Make up a recording or listen to one by a professional hypnotherapist, that includes visualizing healing red blood cells surrounding the injured muscle, tendon, bone, etc. with nutrients, directed at rapid reduction of inflammation and total healing.

Injured athletes should experiment with all available relaxation methods to find the ones that are most comfortable and beneficial. A combination of methods can be used; it’s up to athletes to decide which ones are best suited for them. Once the athlete has become comfortable with a specific technique, it then must be practiced for maximum results.

Three steps to visualize sport performance while injured

If you’re injured, you can still visualize championship-level performance and begin to lay hypnotic tracks in your subconscious mind that will carry over once you’re physically able to perform. Here are some easy steps for visual performance training while you’re still injured:

  1. Watch videos of yourself performing, especially ones highlighting best previous performances. If a personal highlight reel isn’t available, watch training videos of other great athletes in action.
  2. Close your eyes and imagine your ideal performance. Really get a good sense of what you look like and feel like when you perform.
  3. Practice this imagery using the actual time sequence of your average performance. For example, if you’re a track athlete, “run a race” on a stationary bike. If the race is for 400 meters, “race” on a bike for 50 seconds and at the same time visualize your performance.

You may feel a little silly at first, but trust me, this works.

Staying motivated during rehabilitation

After being injured, athletes can lose a sense of identity and become depressed from not being able to compete. That’s why constant feedback and support from coaches and teammates is so crucial to helping an injured athlete stay motivated. Coaches should encourage injured players to make appearances at practices, and athletes need to be proactive about remaining involved in the team and its progress. Coaches can assign certain duties at practice, involve them in strategy sessions, or let them assist in keeping stats. If an athlete has an upper body injury, they can jump on an exercise bike at practice sites to both maintain endurance and still be a part of the team.

If you stay motivated, practice your visual relaxation and performance techniques, and keep up with your physical therapy treatment, you will be ready to physically compete again before you know it.


dr-singer11Jack N. Singer, Ph.D. is a licensed and certified Clinical/Sport Psychologist and Performance Success Coach, based in Mission Viejo, CA.  For more information and a FREE 15 minute consultation for all Rausch PT clients and family, contact Jack at 949-481-5660. www.drjacksinger.com

April Event of the Month: Adventure Run

Image by Laguna Hills Adventure Run.
Source: Laguna Hills Adventure Run

Come scavenge with the Rausch Physical Therapy & Sports Performance team! Laguna Hills Road Runner Sports Adventure Run is a fun, 60-minute scavenger run that draws hundreds of awesome friends of all ages and running levels. Make sure you stop by the Rehabulance, which will be featured as a remote checkpoint! But, to get your raffle tickets from us, you’re going to have to complete the FITNESS GAUNTLET (dun dun dunn…)

It’s totally FREE to run, all you gotta do is sign up! Click here to pre-register and get a complimentary beer ticket, or register before the run as early as 5:30 PM.

P.S. Don’t forget to wear your Rausch PT gear! Want a Rehabulance T-Shirt to rock? Stop by the clinic before April 23 and let the front desk know!


Event Details

What
Laguna Hills Road Runner Sports Adventure Run
(Click here for more event info)When
April 23, 2015 (Run starts at 6:30 PM)

Theme
Crazy Pants Make Me Dance

Why
Run to fun checkpoints nearby to grab as many free raffle tickets as you can. The more checkpoints you get to, the more chances you’ll have to win over $3,000 in gift certificates and prizes!

  • Hundreds of new, crazy friends
  • Free giveaways and raffle prizes
  • Music and BEER GARDEN
Where
Laguna Hills Road Runner Sports Store
24291 Avenida De La Carlota
Laguna Hills, CA 92653

Are Breaking Pitches Age Dependent?

It’s said that Cy Young Award winner Clayton Kershaw of the Los Angeles Dodgers wasn’t initially a valid prospect as a Major League Baseball pitcher. That is until one spring training game in 2008, when he sent Boston Red Sox heavy hitter Sean Casey back to the dugout shaking his head, leading Vin Scully to exclaim, “Ohhh, what a curveball! Holy mackerel! He just broke off Public Enemy No. 1.” Most Dodgers fans will remember March 9, 2008 as the day of the breakout breaking pitch that started Kershaw’s legendary career.

Image by Rausch Physical Therapy & Sports Performance.

Kershaw was just 19 years old when he showed the world he had mastered his 12-6 curveball in that storied spring training game. However, it’s been long proposed that allowing young pitchers to throw breaking pitches, such as curveballs and sliders, has created more injuries in youth baseball. So just how much truth is there to that old adage?

The best pitches for young baseball players

Research highlights the importance of factoring in the age and physical maturity of a player before teaching certain breaking pitches. Several recent studies claim that most throwing injuries that develop later on in a baseball player’s career can be traced back to throwing breaking pitches incorrectly or at too young of an age.

Due to the immaturity of a young pitcher’s body and the lack of strength throughout his/her shoulder and forearm, the best pitches for young ballplayers to learn are the fastball and change up. These two pitches create the least amount of strain and torque on the shoulder and elbow.

The worst pitches for young baseball players

While there is no definitive proof that throwing curveballs directly causes injury, this pitch does place increased strain on the shoulder when thrown incorrectly. With this in mind, coaches and parents should hold off on teaching their players how to throw a curve until s/he is at least 15 years old. What about the slider? While the angle of release makes the slider easier on the shoulder than the curveball, due to the increased torque on the elbow compared to other pitches it should still not be initiated until a pitcher is at least 16 years old. Other pitches, such as the sinker, knuckleball and screwball, also put significant strain on the shoulder and elbow and are therefore not advisable until a pitcher is much older.

Age (in Years) Recommendation For Learning Various Pitches

This chart explains the appropriate age to start teaching ballplayers certain pitches:

Fastball: 8 ± 2 Slider: 16 ± 2
Change-up: 10 ± 3 Forkball: 16 ± 2
Curveball: 14 ± 2 Screwball: 17 ± 2
Knuckleball: 15 ± 3

Even once a ball player is determined mature enough to learn breaking pitches, there still needs to be proper instruction to safely execute these pitches and minimize a player’s injury potential. Breaking pitches are age dependent, and coaches and parents must adhere to this guideline or they’ll increase the risk of injury in their child or players.

[framedbox]References and Further Reading:


Jonathan-Meltzer

Jonathan Meltzer graduated from the University of Redlands with a bachelor of arts in biology and a minor in physical education. Following graduation, Jonathan discovered his passion for physical therapy while working as a Physical Therapy Aide. After graduating top of his class from Loma Linda University in 2012 with a Doctorate in Physical Therapy, Jonathan began his career at Rausch Physical Therapy and Sports Performance. Jonathan’s goals are to identify limitations and treat his patients with the most recent and innovative techniques in order to maximize functional independence and obtain his patients’ individual goals.