5 Effective Hip Mobility Exercises

Wondering how to increase your hip mobility? These everyday moves will make hip tightness and lower back pain a thing of the past. You can incorporate these into your everyday routine. No special equipment is needed — and start 2023 pain-free. If you’re still suffering from limited hip mobility, let us help. We have 1001 tools to enhance your mobility and reduce pain — and reoccurring injuries.

These everyday moves will make hip tightness and low back pain a thing of the past.

Having tight hips is a common complaint, especially among adults who find themselves in a seated position for extended periods of time—a posture that can cause the hip flexor muscles to become short and stiff. Adults—women, in particular—also tend to hold a “tremendous amount of stress in [their] hips,” says Stefanie Corgel, certified strength and conditioning coach and group fitness instructor in Los Angeles.

That’s why it’s important not only to stretch your hips, but to do active hip exercises to improve strength, flexibility, and mobility. What’s the difference between a hip stretch and a hip exercise, and between hip flexibility versus mobility? A simple distinction: think passive versus active. “Hip flexibility is defined as length through range of motion while mobility points to more targeted strength and control of the muscle as it completes a movement pattern,” Corgel explains.

Mobility is just as important as flexibility, especially as you age. All of the activities you love doing—walking, cycling, dancing, or playing with your kids and pets—require joint mobility as a foundation. “Over time, if joints lack mobility, your performance and ability to improve is greatly inhibited,” Corgel says. The less you move, use, and strengthen certain body parts, the less likely they are to work optimally. This can also cause you to experience more aches and pains from everyday activities (even from just sitting!).

To keep your hips (and their surrounding muscles) strong and mobile, Corgel shares five hip exercises you can do anytime. Spend five to 10 minutes working through these hip-specific mobility exercises daily, and you’ll start to notice improved range of motion and hopefully less hip and lower back pain (which often stems from tight hips!) pretty quickly.

Simple Hip Exercises to Try Anywhere

Frog Squat

Stand with your feet slightly wider than shoulder-width. Turn your feet out at a diagonal and make sure your knees align vertically with your ankles. Keeping weight in your heels, bend your knees and slowly lower your butt to the floor—as low as you can comfortably go. Hold this low squat position for about 30 seconds, using your elbows to press your knees gently outward. Release to a standing position and shake your legs out. Repeat five times.

Tabletop Hip Circles

Start on the floor on your hands and knees, stacking shoulders over wrists and hips over knees. Keeping your pelvis level with the floor, engage your right glute and lift your right knee out to the side (think: dog at a fire hydrant). Draw a circle in the air with your right knee five times, keeping your right knee bent. It’s OK if you can’t lift your knee up very high—it’s better to do circles lower to the floor than to try to lift your leg higher and have your back and pelvis tilt to the side. Switch the direction of the circles and repeat five more times. Then switch legs and repeat. Do this one to two times per each side.

Kneeling Lunge to Half Split Rocks

Start by kneeling with both knees on the floor. First move into a kneeling lunge: Step your right foot forward until your right thigh is parallel to the floor (about one or two feet in front). Let your left leg extend behind you, place the top of your left foot on the floor, and reach your arms straight overhead (without scrunching up your shoulders). Then move into a half split: Slowly shift your weight back, sending your butt toward your left heel, as your right toes come up off the floor and your right leg is now straight (right heel should still be planted on the floor). At the same time, bend forward over your right leg and touch your hands to either side of your right foot. Move back and forth with control between these two positions five times before repeating the sequence with the other leg in front.
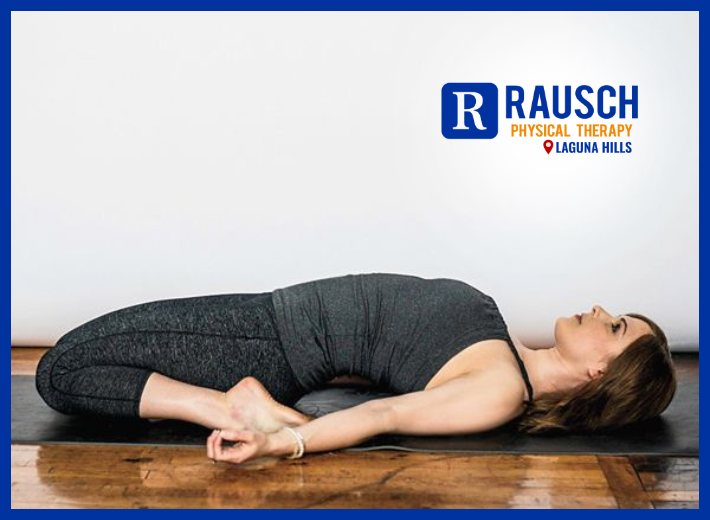
Hip 90/90

Sit on the floor with feet on the floor in front of you, knees bent, and legs open slightly wider than your hips. Place your hands on the floor on either side of your hips for support, or hold your arms out in front of you for more of a challenge. Slowly let your knees drop to one side, creating 90 degree angles at your hips and knees. Making sort of a wind-shield-wiper motion with your knees, rotate them back up to center then slowly let them knees drop to the opposite side. Rotate back and forth with control for about 30 seconds, rest, and repeat one or two more times.

Standing Leg Swings

Stand with your feet together next to a wall or doorway that you can hold with your hand for balance. From this position, swing your inside leg forward and backward with control, making sure not to swing so far forward or backward that you can’t keep a relatively neutral/straight back (no need to hurt yourself or impress the Rockettes). Repeat five times forward and backward. Then stand facing the wall and repeat five more times, swinging the same leg from side to side. Switch sides and repeat the same sequence with the opposite leg.

If you’re dealing with limited hip mobility or discomfort, it may be time for a professional consultation at Rausch PT. Book your appointment today at 949-276-5401 and meet our experts. To get health and wellness updates and learn about what we have to offer ongoing, join our Facebook community.


Reference: [https://www.realsimple.com/health/fitness-exercise/workouts/hip-exercises]

How to Avoid Sports Injuries in 2023

Here’s to the new year…and the opportunity to start anew and set your fitness goals. But as essential as preparing for that match or running a marathon is to keep your body free from pain. To help keep you from experiencing a sports-related injury, we provide the following prevention tips. We have 1001 tools to help you crush your goals — enhancing your mobility and recovery — and keeping you injury-free. 

Whether you play sports for competition or fitness, you don’t want to be sidelined with an injury. Time away from the game or in forced inactivity is something we all want to avoid. While it is impossible to prevent every injury, the American Academy of Orthopaedic Surgeons says research suggests that injury rates could be reduced by 25% if athletes took appropriate preventative action. Use these general rules for injury prevention no matter what sport you play.

Be in Proper Physical Condition to Play a Sport

Keep in mind the weekend warrior has a high rate of injury. If you play any sports, you should adequately train for that sport. It is a mistake to expect the sport itself to get you into shape. Many injuries can be prevented by following a regular conditioning program of exercises designed specifically for your sport.

Know and Abide by the Rules of the Sport

The rules are designed, in part, to keep things safe. This is extremely important for anyone who participates in a contact sport. You need to learn them and to play by the rules of conduct. Respect the rules on illegal procedures and insist on enforcement by referees, umpires, and judges. These rules are there to keep athletes healthy. Know them. Follow them.

Wear Appropriate Protective Gear and Equipment

Protective pads, mouth guards, helmets, gloves, and other equipment are not for those you consider weak; they are for everyone. Protective equipment that fits you well can save your knees, hands, teeth, eyes, and head. Never play without your safety gear.

Rest

Athletes with a high number of consecutive days of training, have more injuries. While many athletes think the more they train, the better they’ll play, this is a misconception. Rest is a critical component of proper training. Rest can make you stronger and prevent injuries of overuse, fatigue and poor judgment.

Always Warm-Up Before Playing

Warm muscles are less susceptible to injuries. The proper warm-up is essential for injury prevention. Make sure your warm-up suits your sport. You may simply start your sport slowly, or practice specific stretching or mental rehearsal depending upon your activity.

Avoid Playing When Very Tired or in Pain

This is a set-up for a careless injury. Pain indicates a problem. You need to pay attention to warning signs your body provides.

Factors That Increase Your Risk of Sport Injuries

Research provides us with helpful clues about the cause of sports injury. There are two factors that outweigh the rest when it comes to predicting a sports injury. They are:

  • Having a history of injury. Previous injuries to a muscle or joint tend to develop into chronic problem areas for many athletes. It is extremely important to warm up, and stretch previously injured parts.
  • A high number of consecutive days of training. Recovery days reduce injury rates by giving muscles and connective tissues an opportunity to repair between training sessions.

Physical therapy is a natural and healthier solution to ease pain and avoid injuries. Our team can teach you proper techniques to reduce your chances of recurrence. Start the new workout season fully prepared and at your peak. Find our team at 949-276-5401 or meet us on our Facebook page.


Reference: [https://www.verywellfit.com/how-to-prevent-sports-injuries-3119270]

Help Save Lives during National Blood Donor Month

January marks the 53rd anniversary of National Blood Donor Month. A decision to donate your blood can save a life. And there is nothing like starting 2023 helping people and feeling healthy. Here you can learn how to prepare and what to expect from the procedure.

Blood donation is a voluntary procedure that can help save lives. There are several types of blood donation. Each type helps meet different medical needs.

Whole blood donation

Whole blood donation is the most common type of blood donation. During this donation, you donate about a pint (about half a liter) of whole blood. The blood is then separated into its components — red cells, plasma and sometimes platelets.

Apheresis

During apheresis, you are hooked up to a machine that collects and separates different parts of your blood. These blood components include red cells, plasma and platelets. The machine then returns the remaining parts of the blood back to you.

  • Platelet donation (plateletpheresis) collects only platelets. Platelets are the cells that help stop bleeding by clumping and forming plugs in blood vessels (clotting).Donated platelets are commonly given to people with clotting problems or cancer and people who will have organ transplants or major surgeries.
  • Double red cell donation allows you to donate a concentrated amount of red blood cells. Red blood cells deliver oxygen to your organs and tissues.Donated red blood cells are typically given to people with severe blood loss, such as after an injury or accident, and people with sickle cell anemia.
  • Plasma donation (plasmapheresis) collects the liquid portion of the blood (plasma). Plasma helps blood clot and contains antibodies that help fight off infections.Plasma is commonly given to people in emergency and trauma situations to help stop bleeding.

Why it’s done

You agree to have blood drawn so that it can be given to someone who needs a blood transfusion.

Millions of people need blood transfusions each year. Some may need blood during surgery. Others depend on it after an accident or because they have a disease that requires certain parts of blood. Blood donation makes all of this possible. There is no substitute for human blood — all transfusions use blood from a donor.

Risks

Blood donation is safe. New, sterile disposable equipment is used for each donor, so there’s no risk of getting a bloodborne infection by donating blood.

Most healthy adults can donate a pint (about half a liter) safely, without health risks. Within a few days of a blood donation, your body replaces the lost fluids. And after two weeks, your body replaces the lost red blood cells.

How you prepare

Eligibility requirements

To be eligible to donate whole blood, plasma or platelets, you must be:

  • In good health.
  • At least 16 or 17 years old, depending on the law in your state. Some states allow legal minors to donate with parent permission. While there’s no legal upper age limit, policies may vary between individual donor centers.
  • At least 110 pounds (about 50 kilograms).
  • Able to pass the physical and health-history assessments.

Eligibility requirements differ slightly among different types of blood donation.

Food and medications

Before your blood donation:

  • Get plenty of sleep the night before you plan to donate.
  • Eat a healthy meal before your donation. Avoid fatty foods, such as a hamburger, fries or ice cream.
  • Drink plenty of water before the donation.
  • Check to see if any medications you are taking or recently took would prevent you from donating. For example, if you are a platelet donor, you must not take aspirin for two days prior to donating. Talk to your health care provider before you stop taking any medications.
  • Wear a shirt with sleeves that can be rolled up.

What you can expect

Before the procedure

Before you can donate blood, you will be asked to fill out a confidential medical history. It includes questions about behaviors known to carry a higher risk of bloodborne infections — infections that are transmitted through blood.

Because of the risk of bloodborne infections, not everyone can donate blood. The following are groups that are not eligible to donate blood:

  • Anyone who has used injected drugs, steroids or another substance not prescribed by a health care provider in the past three months
  • Men who have had sexual contact with other men in the past three months
  • Anyone who has a congenital coagulation factor deficiency
  • Anyone who has had a positive test for HIV
  • Anyone who has engaged in sex for money or drugs in the past three months
  • Anyone who, in the past 12 months, has had close contact with — lived with or had sexual contact with — a person who has viral hepatitis
  • Anyone who has had babesiosis, a rare and severe tick-borne disease, or the parasitic infection Chagas’ disease

You will also have a brief physical exam. The exam includes checking your blood pressure, pulse and temperature. A small sample of blood is taken from a finger prick and is used to check the oxygen-carrying part of your blood (hemoglobin level). If your hemoglobin concentration is within a healthy range, and you’ve met all the other screening requirements, you can donate blood.

COVID-19 concerns

The virus that causes coronavirus disease 2019 (COVID-19) hasn’t been shown to be transmitted through blood transfusions. However, the U.S. Food and Drug Administration suggests waiting to donate blood for at least 10 days after a positive diagnostic test for COVID-19 without symptoms or for at least 10 days after symptoms of COVID-19 have completely gone away.

Those who have tested positive for COVID-19 antibodies but didn’t have a diagnostic test and never developed symptoms can donate without a waiting period or having a diagnostic test done before donation.

If you get a nonreplicating, inactivated or mRNA-based COVID-19 vaccine, you can donate blood without a waiting period. However, if a live attenuated viral COVID-19 vaccine becomes available and you get it, wait 14 days after being vaccinated before donating blood. If you aren’t sure what type of vaccine you got, wait 14 days before donating blood.

During the procedure

You lie or sit in a reclining chair with your arm extended on an armrest. If you have a preference for which arm or vein is used, tell the person who is collecting your blood. A blood pressure cuff or tourniquet is placed around your upper arm to fill your veins with more blood. This makes the veins easier to see and easier to insert the needle into. It also helps fill the blood bag more quickly. Then the skin on the inside of your elbow is cleaned.

A new, sterile needle is inserted into a vein in your arm. This needle is attached to a thin, plastic tube and a blood bag. Once the needle is in place, you tighten your fist several times to help the blood flow from the vein. First, blood is collected into tubes for testing. Then blood is allowed to fill the bag, about a pint (about half a liter). The needle is usually in place about 10 minutes. When your donation is finished, the needle is removed, a small bandage is placed on the needle site and a dressing is wrapped around your arm.

Another method of donating blood becoming increasingly common is apheresis. During apheresis, you are hooked up to a machine that can collect and separate different parts of your blood, such as red cells, plasma and platelets. This process allows more of a single component to be collected. It takes longer than standard blood donation — typically up to two hours.

After the procedure

After donating, you sit in an observation area, where you rest and eat a light snack. After 15 minutes, you can leave. After your blood donation:

  • Drink extra fluids.
  • Avoid strenuous physical activity or heavy lifting for about five hours.
  • If you feel lightheaded, lie down with your feet up until the feeling passes.
  • Keep your bandage on and dry for the next five hours.
  • If you have bleeding after removing the bandage, put pressure on the site and raise your arm until the bleeding stops.
  • If bruising occurs, apply a cold pack to the area periodically during the first 24 hours.
  • Consider adding iron-rich foods to your diet to replace the iron lost with blood donation.

Contact the blood donor center or your health care provider if you:

  • Forgot to report any important health information to the blood donation center.
  • Have signs and symptoms of an illness, such as a fever, within several days after your blood donation.
  • Are diagnosed with COVID-19 within 48 hours after donating blood.

Results

Testing

Your blood will be tested to determine your blood type and your Rh factor. Blood type is classified as A, B, AB or O. The Rh factor refers to the presence or absence of a specific antigen — a substance capable of stimulating an immune response — in the blood. You’ll be classified as Rh positive or Rh negative, meaning you do or don’t carry the antigen. This information is important because your blood type and Rh factor must be compatible with the blood type and Rh factor of the person receiving your blood.

Your blood will also be tested for bloodborne diseases, such as hepatitis and HIV. If these tests are negative, the blood is distributed for use in hospitals and clinics. If any of these tests are positive, the donor center notifies you, and your blood is discarded.

We help athletes reach their maximum potential by combining our innovative performance technologies with our expertise in human mechanics. Let us help you perfect your form and meet your fitness goals for 2023. Contact our experts today at 949-276-5401 and join our Facebook community here.


Reference: [https://www.mayoclinic.org/tests-procedures/blood-donation/about/pac-20385144]