Blog

Pre-surf warm-up for Hips and Lower Back

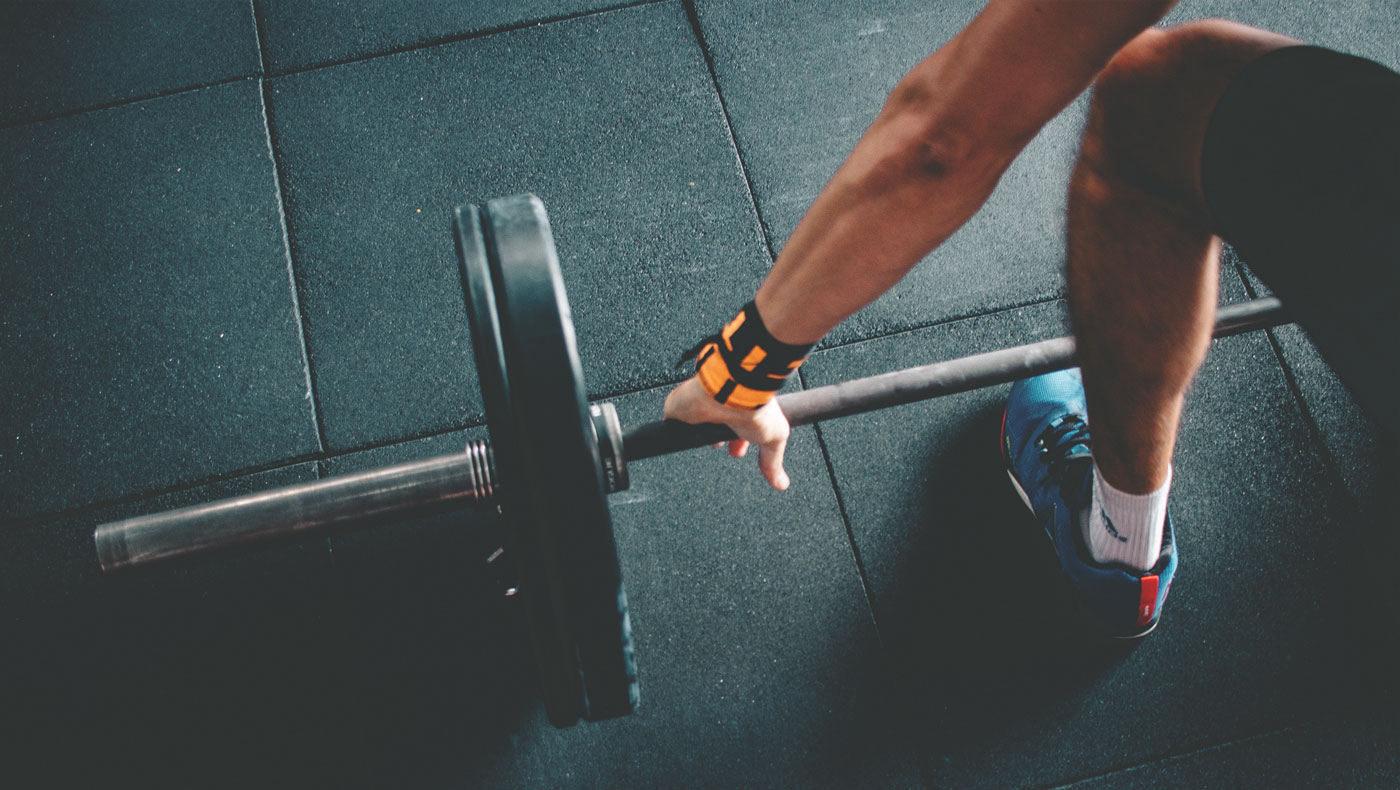
Surfing requires a lot of flexibility and strength. Generating strength and power for turning requires joint mobility and muscle flexibility to transfer your momentum from your legs to your trunk and upper body. Joint mobility refers to how much your bone moves in the joint capsule before the slack is taken up by the surrounding capsule, ligaments, and tendons. Muscle flexibility refers more to muscle length and elasticity. Dynamic flexibility is your ability to actively move a joint through the full range of motion. Limitations in either joint mobility or muscle extensibility will affect your ability to move freely. 

A lack of muscle flexibility and joint mobility is a big risk factor in developing muscle injuries. When it comes to flexibility and mobility, you either use it or lose it. Since the majority of us work 5 days a week, most of us can’t surf every day. Sitting for 6-8 hours per day will certainly lead to muscle restrictions and joint stiffness through your hips and your back.

Spinal rotation and hip mobility are key to generating powerful turns. As you move through your turn, joint stiffness and muscle restrictions will limit the power of your turn. Turning requires a significant amount of joint mobility as well as flexibility through the hips and ankles which then transfers to your upper body through your lower back up your spine to your shoulders and neck. Forcing a restricted joint through a powerful turn can lead to injury. Tight hips can increase torque to your lower back or knees and overload the joints and muscles which can result in pain, injury, or instability. Similarly, a tight or stiff lower back may result in excessive strain on the surrounding muscles, joints, and discs. A warm-up specifically targeting your hips and back before surfing will help your body move freely and reduce the risk of injury while transitioning through powerful turns. 

Before getting in the water for a 6 AM dawn patrol Saturday morning, you want to make sure your body is moving freely to prevent injury. After 40 hours at the office during the week, take the time to spend 5 minutes before paddling out to free up the joints that have not been moving all week. 

Here are a few warm-up exercises to loosen up the hips and back to you moving before getting out in the water. You want to make sure your whole body moves freely before forcing it into a big hacking turn. 

Pigeon stretch

Start on hands and knees, bring the front leg into external rotation keeping the knee in line with the hip, aim to keep the shin perpendicular to the thigh. Keep the back leg straight with hips square with equal weight in both hips. Perform on both sides.  

This is a great stretch for the external rotators and hip flexors to open the hips. I do not recommend this stretch for anyone with a knee injury since it does put stress on the knee. This is easily modified to do in the water between sets, you can do it with your leg on your board or by crossing your leg over your knee in the water bringing your knee towards your chest while floating in the water. 

Bretzel stretch

Lay on the side, keep the bottom leg in line with the trunk with the knee bent 90º, the top leg bends 90º at the hip with the knee flexed 90º. Place your arms into a ’T’ to rotate your spine. Perform on both sides for 30″-1′. 

This is a great stretch for opening up the lumbar and thoracic spine as well as the shoulders. You may feel tighter on one side than the other. Doing 5-8 deep breaths while doing this stretch will help the body relax and enable the back and shoulders to open up. 
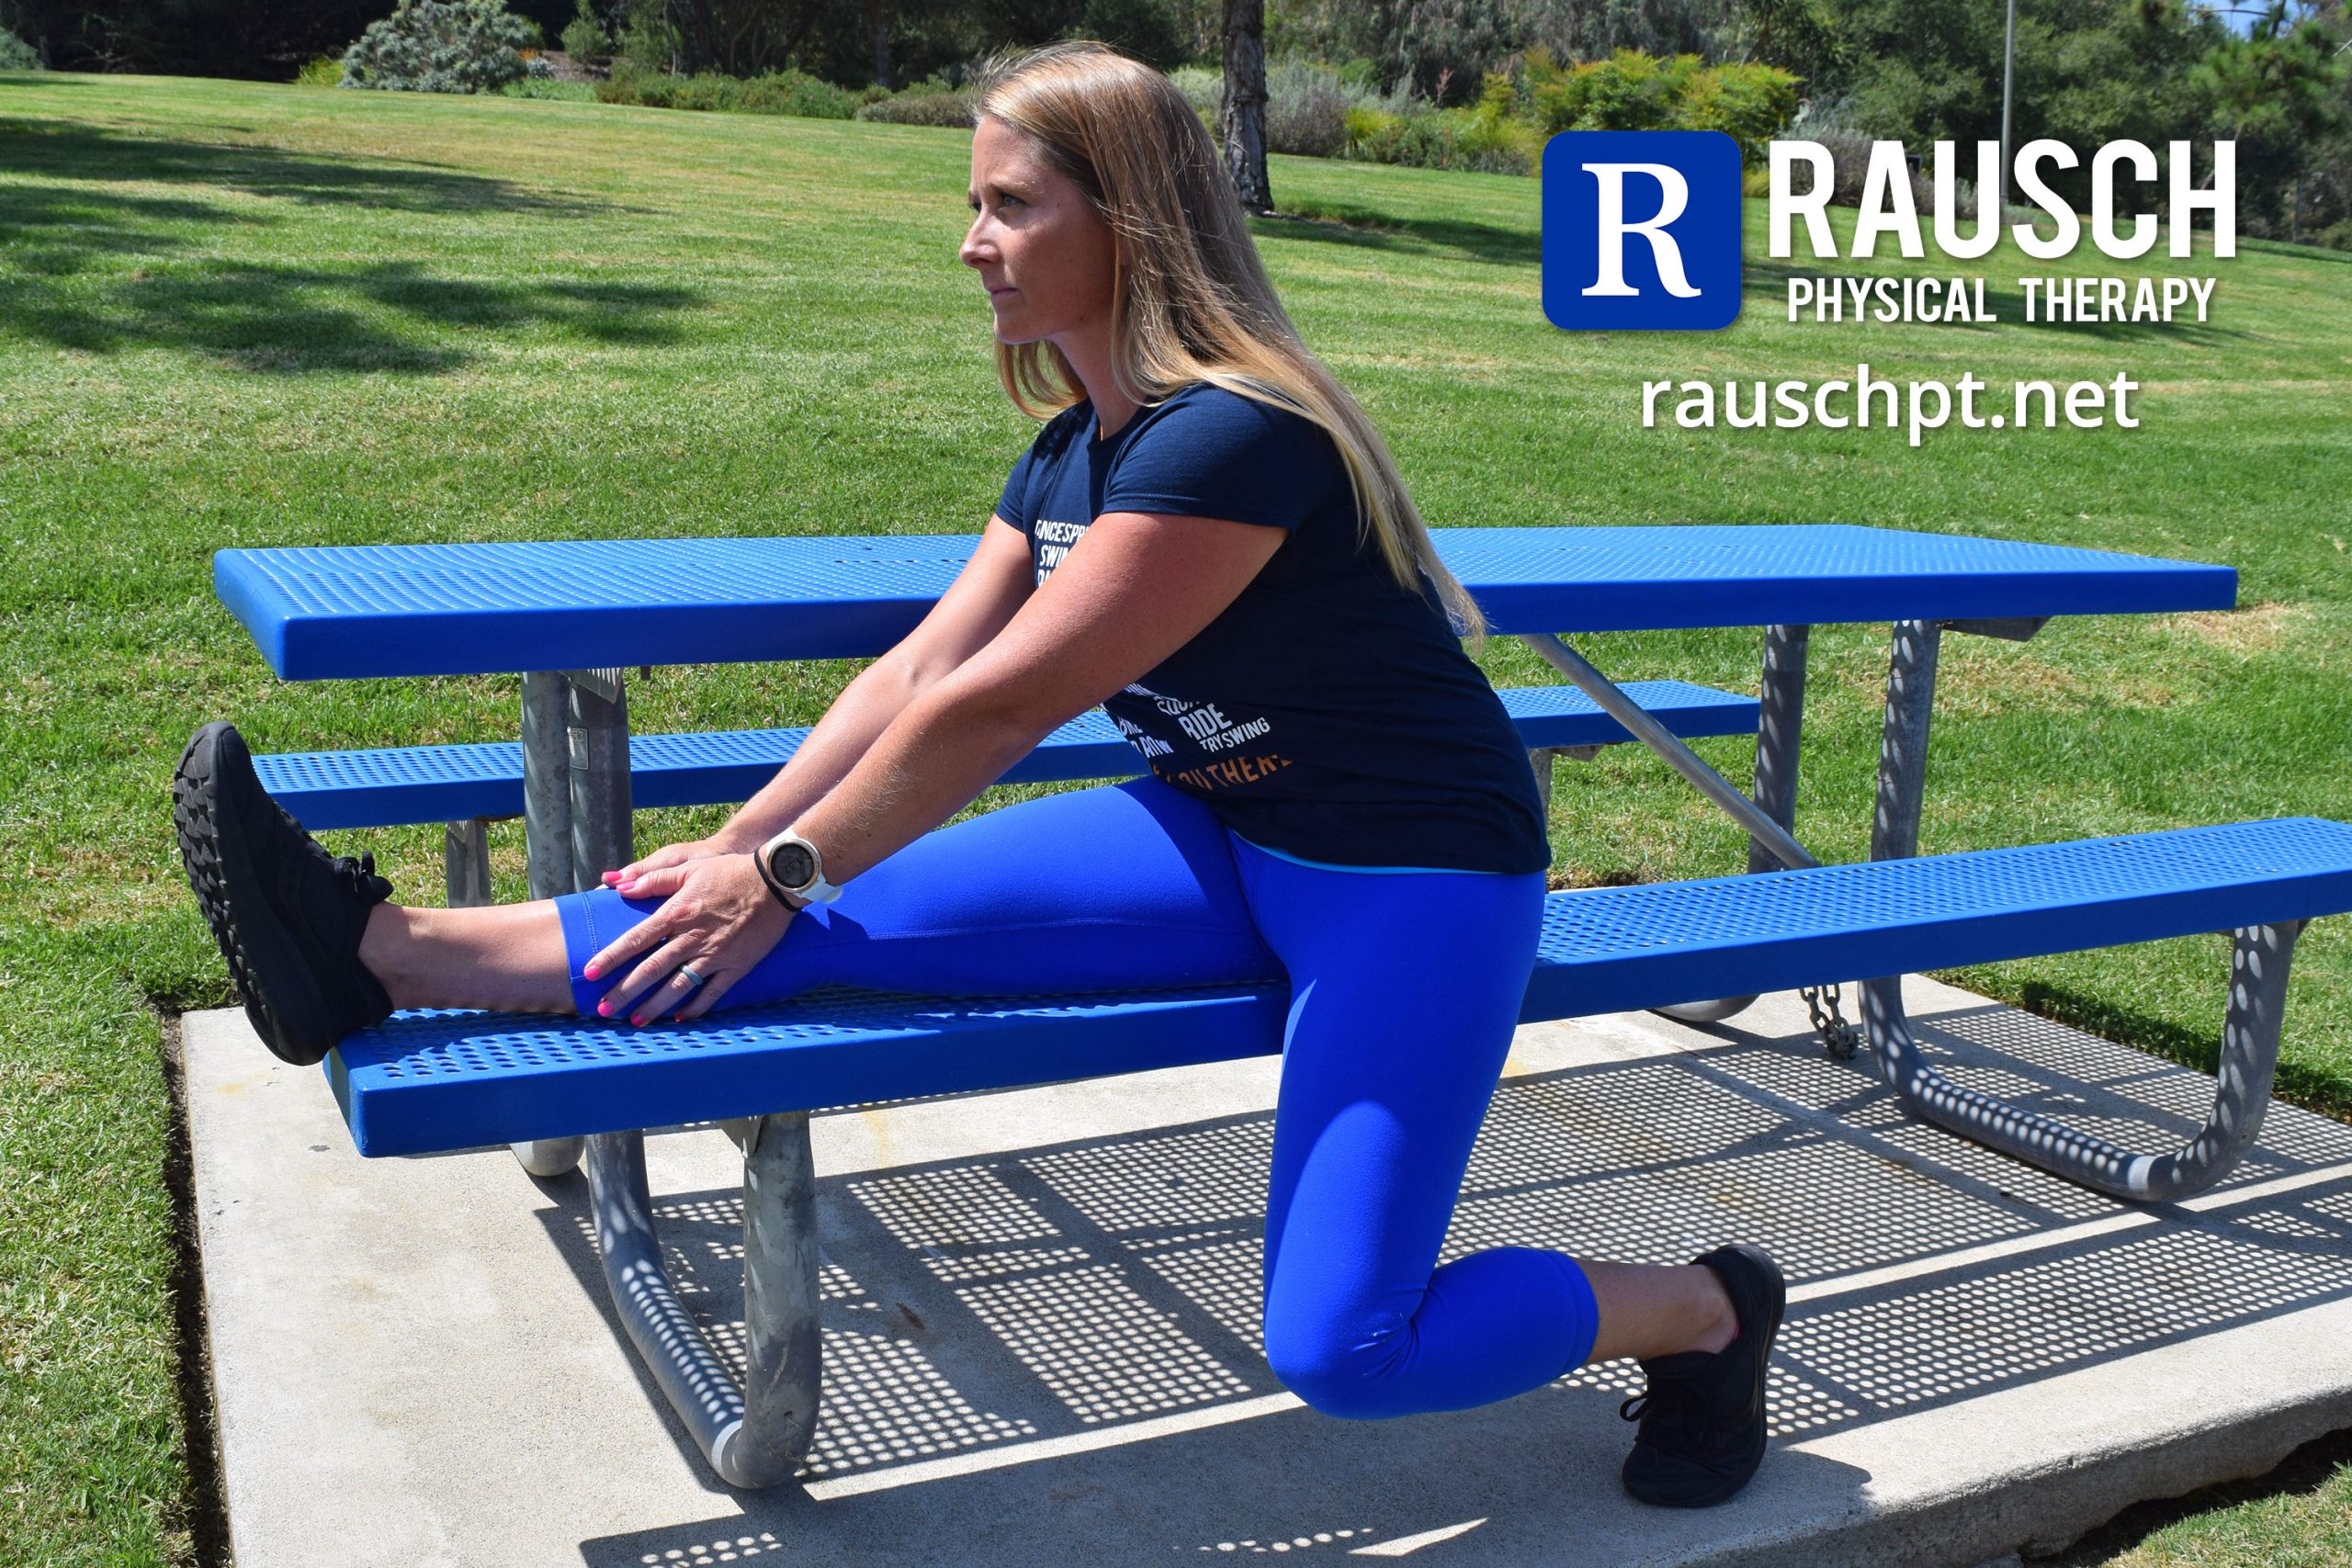
Low Lunge

Start in a push-up position, bring your right foot forward between hands, keep your knee stacked over the ankle. Keep left leg back extending while sinking the hips by driving your heel to the ground. Make sure to keep back flat and feet pointed forward. Perform a series of 5 on each leg alternating sides. 

Crescent Lunge Twist

From the low lunge position, move your right hand inside of the right foot, look up towards your raised left arm. Raise the left arm and gaze up while twist body to the left. Repeat on the opposite side.

The Low Lunge and Crescent lunge twist are good hip openers and provide dynamic mobility to the spine for standing up on your board. 

Downward dog to upward dog

Start on hands and knees with hands directly under shoulders and knees directly under hips. Lift your hips up and back to bring your body into an inverted ‘V’ while driving heels to the ground and keeping back flat. Press your hands to the floor pushing your shoulders away and gently rotating outward into your hands. Keep your head/neck relaxed. 

The transition from downward dog to a push-up position, hold for 2-3 seconds, then transition to upward facing dog position by shifting weight forward to lower the body while keeping elbows squeezed against the rib cage. Turn feet pointing down into plantarflexion, then press up keeping shoulders stacked over hands and squeezing shoulder blades together to open the chest. Legs should be engaged ‘hovering’ over the ground, not resting on it. Repeat this sequence 5 times.  

Be careful to avoid over-extending through your lower back, don’t move through pain. 

This sequence is helpful to mobilize the spine, wake up the shoulders and your core. 

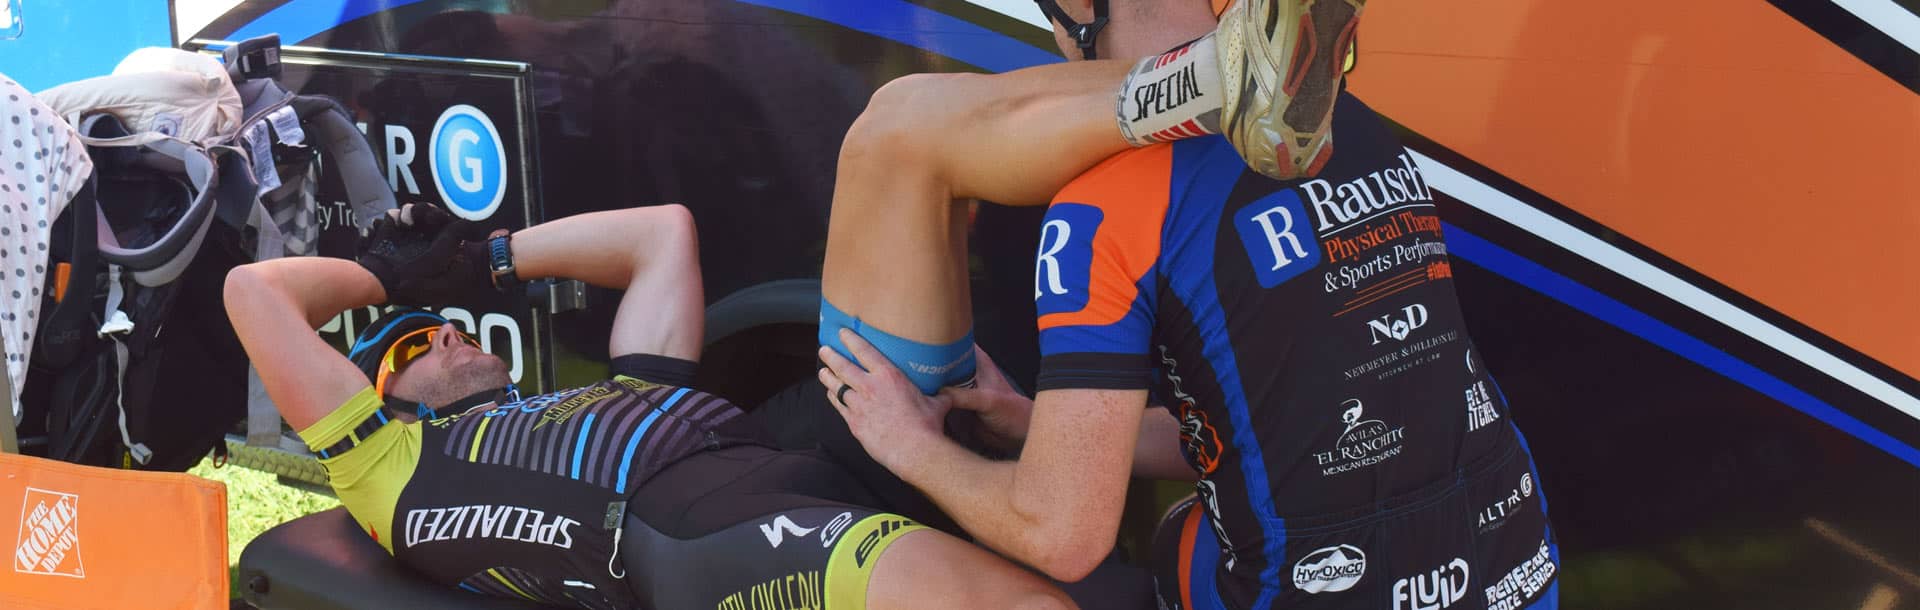
Also, remember that physical therapy can also be a preventative approach! A licensed physical therapist can help evaluate and assess you for any mobility restrictions or muscular imbalances and recommend a proper program!


Clay Simons

clay@rauschpt.net

Did you know there’s no prescription needed from a doctor to see us – but we will communicate your progress and treatment to your doctor if you’d like us to!  (949) 276-5401

Disclaimer — All the information that you find on our blogs and social media pages is for informational purposes only and is not intended to be used as your personal professional diagnosis, or treatment. Come and see us for your excellent, personalized care! RauschPT.net

RauschPT

An Overview of Tennis Elbow

Despite its name, “tennis elbow” does not solely occur in tennis players. In fact, it’s a very common issue to many athletes. Learn about how to identify the symptoms, diagnosis, and treatment options. With physical therapy, you can both treat your injury and learn how to keep it from happening again. Your Rausch physical therapist will be by your side throughout your entire treatment.

Despite its name, “tennis elbow”, or lateral epicondylitis, does not solely occur in tennis players. Tennis elbow is actually the most common condition seen in patients experiencing elbow pain and is thought to be due to small tears of the tendons that attach forearm muscles to the arm bone at the elbow joint.

The diagnosis of tennis elbow is made through a medical history and physical examination. Additional tests may be ordered to rule out other health conditions that cause lateral elbow pain.

Treatment of tennis elbow is conservative and usually involves rest, wearing a forearm brace, and taking an anti-inflammatory medication.

Most patients with tennis elbow are between the ages of 30 and 50 years old. Tennis elbow affects an equal number of men and women and occurs in the dominant arm in about 75% of people.

Causes

Tennis elbow occurs when there is a problem with the tendon (called the extensor carpi radialis brevis muscle tendon) that attaches to the outside part of the elbow bone called the lateral epicondyle, thus giving tennis elbow the medical name ‘lateral epicondylitis.’ This tendon is the attachment site of the muscle that functions to cock the wrist back (called wrist extension).

It’s important to note that the tennis elbow is not simply a tendon “inflammation.” Rather, as a result of repetitive use, experts believe that incompletely healed microscopic tears develop within the tendon.1 This leads to a degenerative (“wear and tear”) process and subsequent pain and tenderness felt at the outside of the elbow.


While tennis elbow may occur on its own, there are two groups of people that are especially vulnerable to developing this condition:

  • Sports Participants: Athletes, especially racquet sport players, are prone to developing tennis elbow. About a third of amateur tennis players experience tennis elbow at some point in their careers. In addition to racquet sports, tennis elbow is seen in golfers, fencers, and other sports participants.
  • Manual Laborers: People who work with their hands are at greater risk of developing tennis elbow. Jobs that may lead to tennis elbow include plumbers, painters, gardeners, and carpenters.

Besides activities that require repetitive gripping and grasping, trauma (in the form of a direct hit to the elbow which leads to tendon swelling) can also cause tennis elbow; although, this is a less common culprit.

Symptoms

The most common symptoms of tennis elbow are:

  • An aching or burning pain over the outside of the elbow that is worsened by gripping or lifting
  • Pain starts at the elbow but then may spread to the forearm
  • Weak grip strength

The pain associated with the tennis elbow usually has a gradual onset, but it may also come on suddenly. Pain can be highly variable too, ranging from very mild to severe and debilitating.

Diagnosis

The diagnosis of tennis elbow is made through a medical history and physical examination. Additional tests may be ordered to rule out other conditions that cause elbow pain.

Besides tennis elbow, there are several other causes of pain over the outside of the elbow including instability of the joint, elbow arthritis, radial tunnel syndrome, and cervical radiculopathy. These conditions are generally considered if the symptoms are not typical for tennis elbow, or if a person with presumed tennis elbow does not respond to treatment.

Medical History and Physical Examination

In addition to inquiring about the characteristics of your elbow pain (e.g., location and severity), your doctor will ask you about any potential risk factors, like whether you have participated in a certain job or sports-related activities or experienced a recent elbow injury or trauma.

Your doctor will also ask you about your medical history, like whether you have a history of rheumatoid arthritis or elbow nerve entrapment.1

During the physical exam, your doctor will press on your elbow at various sites to evaluate for tenderness. With tennis elbow, there is usually tenderness about one centimeter from the lateral epicondyle itself.

Your doctor will also move (flex and extend) your wrist while your arm and elbow are held out to see if this increases or reproduces your pain.

Other Tests

Various tests may be used to diagnose some of the above conditions. For example, while an X-ray should be normal with a tennis elbow, it may reveal changes consistent with elbow arthritis.

Likewise, a magnetic resonance imaging (MRI) scan is also often normal, although in some individuals the affected tendon may show some abnormal changes. An MRI can also be useful for diagnosing radial tunnel syndrome

Other tests, such as nerve conduction study and electromyography (EMG), are sometimes conducted to rule out nerve compression.1 Blood tests may be utilized to help diagnose inflammatory conditions like rheumatoid arthritis.

When to See a Doctor

The following symptoms should be discussed with your doctor before initiating any treatment:

  • Inability to carry objects or use your arm
  • Elbow pain that occurs at night or while resting
  • Elbow pain that persists beyond a few days
  • Inability to straighten or flex your arm
  • Swelling or significant bruising around the joint or arm
  • Any other unusual symptoms

Treatment

Treatment of tennis elbow entails simple, non-surgical steps, and the good news is that with sufficient time, most individuals respond well.

Non-Surgical Therapies

For most people, one or more of the following treatments are effective for treating tennis elbow:

  • Rest and Activity Modification: Stopping or significantly limiting activities that trigger and/or aggravate the condition (oftentimes for several weeks) is a key first step to healing.
  • Medication: Under the guidance of your doctor, taking a nonsteroidal anti-inflammatory drug (NSAID), can ease inflammation and pain.
  • Brace: Wearing a tennis elbow brace (a band worn over the back of your forearm muscle just below your elbow) can ease the stress on the tendon and muscle.
  • Physical Therapy: Performing exercises that stretch and strengthen your forearm muscles, as well as various techniques like ice massage, heat, or ultrasound, can help improve muscle function and speed up healing.
  • Steroid Injection: In certain cases, your doctor may opt to inject cortisone (a strong anti-inflammatory medication) into the area near your lateral epicondyle.

It is usually best to begin treatments in a stepwise fashion, advancing to the next treatment only if one fails to alleviate your symptoms. It is also important to remember that most patients take a few months from the onset of symptoms to the resolution of symptoms—it is rarely an overnight cure.

Surgery

A small percentage of patients diagnosed with tennis elbow will ultimately require surgical treatment. Generally speaking, patients may consider surgery if more conservative treatments are not effective after a period of six to 12 months.

A Word From Verywell

While “tennis elbow” or lateral epicondylitis is a painful and frustrating condition, be at ease knowing that you are not alone. This condition is common, and with proper time and treatment, the vast majority of people experience tendon healing and relief.


Reference: {https://www.verywellhealth.com/tennis-elbow-a2-2549917}


Performing exercises that address your forearm muscles can help speed up healing. At Rausch PT, our physical therapists can formulate a recovery plan to help get you back on track – and there’s no prescription needed to see a PT. Visit our Facebook page or call us at (949) 276-5401 to book an appointment.

If you find yourself in discomfort or think you could benefit from a personalized exercise plan, talk to a Physical Therapist.

Let’s talk! We are here to help. Give us a call for a complimentary assessment. Did you know there’s no prescription needed from a doctor to see us? (949) 276-5401

Seven Important Fitness Trends for the Year 2021

A big part of keeping injury and pain at bay is maintaining a consistent level of fitness and good health. As with many businesses, the physical therapy and fitness world have and continue to adapt to meet the unique needs of not only this chaotic year but participating individuals as well. 

Rausch Physical Therapy remains your caring team and can accommodate you with a specific, personalized plan. Here is an insight into how the fitness industry will trend into 2021. Call us at (949) 276-5401 to learn how we can help you.


Gyms Have to Meet High Hygiene Standards

Many people have stayed in shape during the lockdown period with running, walking, fitness exercises on their own or free digital services. Of these, a proud number of 73 percent intend to maintain this alternative training in the future. Although most fitness enthusiasts want to go back to the gym in the future, they place the condition that training is not associated with the risk of corona infection.

More Health Orientation in Fitness Offers

The experience of a pandemic, which is unique for everyone, has brought the topic of health into focus for many people much more than before. In principle, this is good for the fitness industry. Fitness strengthens the immune system.

Mindset: Connection of Body and Mind in Training

The trend towards topics such as yoga, mental training or Pilates already existed before Corona. But it has been intensified by the pandemic. More and more people want to combine physical training with mental relaxation.

This desire is triggered not only by job-related stress, also by the strenuous homeschooling with children or financial and health fears in connection with the pandemic.

Differentiated and Target Group Oriented Training

Whether it’s in media use, buying behavior or travel: individualization is advancing in all areas of life. This also applies, of course, to the fitness wishes of the clientele.

Special Offers for Corona Risk Groups and Senior Citizens

For corona risk groups and senior citizens, health and fitness are just as important as for the rest of the population. It makes seniors a core target group that must be wooed with special offers and training opportunities. This can range from individual training or workouts in small training groups to special premises and digital offers for risk-free training at home.

Sport and Fitness Merge

Rather go to the gym to train on workout devices or jog outside? For many fitness freaks, this used to be a real question of faith. The Corona period, including the closure of the studios, has accelerated the resolution of this either/or situation. Many equipment trailers turned to alternative indoor and outdoor offers.

Fitness: Online and Outdoor are Gaining in Importance

In the era of closed fitness studios, even more sports and fitness fans have turned to online offers. With the so-called peloton bike – a spinning bike with which you can connect with spinning fans all over the world via the Internet – you can, for example, do your cardio training in virtual competition with many like-minded people around the globe.

The topic of outdoor fitness is also gaining in importance precisely because of Corona: Intensive training, in particular, is much less dangerous outdoors than indoors because of the draught. This can contribute to the fact that more and more equipment and activities are being moved from gyms to the outside.

Reference: {https://csga.ca/seven-important-fitness-trends-for-the-year-2021/}


RauschPT-logo

Let’s talk! We are here to help. Give us a call for a complimentary consultation. We would love to meet you.

Did you know there’s no prescription needed from a doctor to see us – but we will communicate your progress and treatment to your doctor if you’d like us too!
(949) 276-5401

Disclaimer — All the information that you find on our blogs and social media pages is for informational purposes only and is not intended to be used as your personal professional diagnosis, or treatment. Come and see us for your excellent, personalized care! https://rauschpt.net/

Dear Parents: Stop Overusing Your Kids

Originally published August 17, 2015

Dear Parents of Young Athletes:

As a physical therapist, I have the privilege to work with many of your young all-stars. Some of your kids are here to recover from an injury as quickly as possible so they can get back to competing; others come in for injury prevention so they don’t go down again; and still more are simply going above-and-beyond to understand how their body works so they can push their limits. A few of these young athletes are simply, hyper-focused individuals, self-driven to be the best in their sport, and I’m always impressed by their desire to be here and get better. Unfortunately more often than not, your kids are here because of you, the parent.

Parents are pushing their young athletes to perform and—this is going to be hard for some of you to hear—it’s usually too hard, too much and too fast.

From talking to your kids while they’re on my table, I’ve learned that it’s not uncommon for young athletes to have practice twice a day, sometimes for up to four to six hours a day, just for one sport! Whether it’s swimming, running track, or playing baseball, what this means is that your kids are performing one repetitive, sport-specific movement pattern for hours at a time, day after day, for many, many months straight.

Our bodies were not meant to perform one type of movement pattern for the amount of time that most of these athletes are putting in. Kids used to play a variety of sports throughout the year, which provided the body with more diversity and helped avoid overusing one set of muscle groups. However, our society’s current fascination with the specialization of one particular sport has dramatically increased the tendency of our young athletes to overdevelop particular muscle groups without any counter balance. Over time, the overuse of these muscle groups results in an overwhelming demand that their young bodies simply cannot support, which then leads to the injuries plaguing our children these days.

A prime example of this issue is a young soccer player. Between high school and club games, practices and tournaments, she’s essentially playing soccer year-round. She continues to push her body over and over, month after grueling month, for just this one sport. The result? Her quadriceps become too dominate; her hamstrings, glutes and outside stabilizers are basically non-existent because of the lack of strength training in her other muscle groups. This can potentially lead to an ACL tear, which studies show are up 400% over the last decade.

overuseyouthinjurystats

So whether you like to hear it or not, the fact of the matter is kids are suffering more overuse injuries these days, which ironically leads to a decrease in their overall playing time. You think you have your kid on the path to the Olympics, but instead they’re headed to my PT table with an increased risk of surgeries and chronic joint pain later on in life.

Now don’t get me wrong, I think it’s great that these young athletes are so determined to become the next Mike Trout, Michael Phelps, Misty May-Treanor and so on, but the emphasis on overtraining is a serious issue that needs to be addressed. It all starts with you, parents! Can you be the difference maker in your young athletes’ lives?

Please take caution in playing your young athlete for more than eight months consecutively in a given year. A lot of these injuries can be prevented through multiple sport play, active rest and coming in to see one of our sport-specific PTs here at Rausch Physical Therapy & Sports Performance as soon as your child starts showing warning signs of overuse injury (Remember, if they’re in pain, they should have been in here weeks ago.)

With proper injury prevention knowledge and tools, together we can help reduce this alarming overuse injury trend and keep our kids happy, healthy and in the game much longer.

Sincerely,

Jonathan Meltzer, PT, DPT

[framedbox]

Statistics and Additional Reading:


Jonathan Meltzer graduated from the University of Redlands with a bachelor of arts in biology and a minor in physical education. Following graduation, Jonathan discovered his passion for physical therapy while working as a Physical Therapy Aide. After graduating top of his class from Loma Linda University in 2012 with a Doctorate in Physical Therapy, Jonathan began his career at Rausch Physical Therapy and Sports Performance. Jonathan’s goals are to identify limitations and treat his patients with the most recent and innovative techniques in order to maximize functional independence and obtain his patients’ individual goals.
Let’s talk! We are here to help. Give us a call for an initial evaluation and assessment. We would love to meet you.

Did you know there’s no prescription needed from a doctor to see us – but we will communicate your progress and treatment to your doctor if you’d like us too!

(949) 276-5401

RauschPT

Disclaimer — All the information that you find on our blogs and social media pages are for informational purposes only and are not intended to be used as your personal professional diagnosis, or treatment. Come and see us for your excellent, personalized care! https://staging.rauschpt.net/

Picnic Bench Stretch Series for Outdoor Runners


Everyone knows it’s more fun to run outside, the same thing goes for stretching! PT Ashley Heller shows how you can use picnic benches to help reduce running pain, avoid chronic injury, and improve recovery time while you’re out on a run.

Ashley-Blog
BY ASHLEY HELLER, PT, MPT, RAUSCH PHYSICAL THERAPY

I’m an outdoor gal when it comes to working out. Although I am not competitive runner, running is my go-to outlet for keeping in shape and cross training. For me, running outdoors allows me to recharge, connect with nature, and is one of my favorite ways to cross train and maintain a healthy and active lifestyle.

Whether I’m exploring new trails or running the beach trail, I always make the time to do some dynamic stretches. Dynamic stretching before working out can help improve recovery by minimizing overstrain to tight muscles, as well as improve joint mobility to enhance proper muscle recruitment and minimize compensation that can lead to tissue breakdown and injury. Frequently, I will also stop about one mile into my run to help loosen up even more before finishing the end of my run. Incorporating a few stretches after warming up can be helpful for minimizing discomfort for the duration of the run, improving hip drive while running, and improving overall recovery time.

Since I am usually exercising outside, I love stretching on picnic tables. They offer a good surface for stretching with a variety of heights useful for multiple stretches, plus they are convenient since they are virtually everywhere!

Ashley’s Picnic Bench Stretch Series

Here are my five go-to stretches when I’m running outdoors:

#1 – Quad/Hip Flexor Stretch

Glutes are the driving power for running and propelling the body forward. Lack of hip extension results in decreased running efficiency. Tight hip flexors will limit the ability for the hip to extend and use the glutes. A good hip flexor/quad stretch will allow you to engage your glutes more efficiently.

Cue: Tilt the pelvis like you’re tucking your tail under. Gently squeeze your glute to help relax the psoas and gain a better stretch.

Common mistake: Leaning forward. This results in back extension, not hip extension, which is a common way runners injure their backs.

#2 – Hamstring Stretch

Hamstring tightness is often a contributing factor to back pain or hamstring strains. Hamstring tightness can pull the pelvis into a posterior rotation, which deactivates your abs while running and can lead to back pain over time. Adequate hamstring flexibility will also reduce the amount of tension placed on the sciatic nerve and reduce the risk of hamstring strains while running.

Cue: This can also be done as a long duration stretch for 30 seconds to 1-3 minutes.

Common mistake: Over rounding the back when leaning forward.

#3 – Calf Stretch/Prancing

This dynamic stretch is important for both ankle mobility and the elasticity of the calf complex. Calf flexibility is important in preventing calf strains while running. Stiff ankles result in poor shock attenuation can result in injury from the foot up to the back. Poor dorsiflexion mobility will shorten the calf and Achilles complex prematurely and can result in calf strain, Achilles Tendon or plantar fascia injury.

Cue: Start by standing on a curb or bench, hang the heels off and slowly lower the heel below neutral while bending the opposite knee to raise heel. Alternate dropping the heels to ‘prance’ to improve ankle mobility and calf flexibility.

Common mistake: Excessive pronation or flattening of the foot arch.

#4 – Standing Pigeon Stretch

The standing pigeon stretch opens the hip capsule and hip rotators. This will help promote glute activation and hip drive running.

Cue: Begin with one leg crossed over opposite leg. The thigh should be perpendicular to the body while the knee is bent at 90 degrees. Holding onto the table, lean back into a partial squat position while maintaining a flat back. This stretch can also be performed lying supine on picnic table by cross leg over opposite knee, hold thigh behind the non-stretching knee and pull towards chest.

This stretch can also be performed lying supine on picnic table by cross leg over opposite knee, hold thigh behind the non-stretching knee and pull towards chest.

Common mistake: Pain in knee. If there is discomfort in the knee, modify by performing stretch on your back.

#5 – Adductor Side Lunge

This stretch targets the adductors, which are important for medial knee stability. Adductors can be overlooked when stretching but are important to stabilize the knee to prevent injury.

Cue: Using the table, place your foot of the stretching leg on the bench. Lunge away by bending the knee to about 90 degrees, keep your knee stacked over your ankle.

This can also be done as a dynamic stretch without the picnic bench by alternating lateral lunges. Alternate to stretch each side 5 times, hold 2-3 seconds before alternating.

Common mistake: Going too deep. Knee not stacked over ankle.


PT-Headshots-AshleyAshley Heller, MPT is a licensed physical therapist at Rausch Physical Therapy & Sports Performance. She received her Masters of Physical Therapy degree at California State University, Long Beach and is passionate about working with patients with shoulder, knee and ankle injuries. With background in orthopedic-related injuries and post-operative rehabilitation, Ashley believes that the combination of manual therapy and personalized therapeutic exercise program is vital to recovery. Known as the Water Sports PT, Ashley says her goal is to help her patients better understand their injuries and the plan for their road to recovery.

Click to learn more about Ashley and our other physical therapists »


The Forgotten Disciplines of Triathlon


PT Kevin Capata shares why its not the lack of mileage that you put into your training schedule that has kept you from reaching your PRs, staying injury-free, or conquering plateauing, but the often forgotten aspect of cross training.

Capata-Blog
BY KEVIN CAPATA, PT, DPT, CSCS, RAUSCH PHYSICAL THERAPY

If you’re an amateur triathlete like me, you’re probably often stressed trying to juggle all the tasks of daily life with a set training plan, strict dietary guidelines, and recovery efforts. So maybe you’ve already heard about the benefits of adding cross training to your plan, but you’ve always thought, “I just don’t have time. When am I supposed to get to the gym to lift weights or attend weekly Yoga class?” “How the heck am I supposed to cram in even more training?”

All good questions, and trust me, I get it! But I challenge you with one of my own. Have a 25-mile ride planned for Monday morning? Why not make it 22 miles, and use that extra 15 to 20 minutes to do some single-leg pistol squats, burpees, plank bird dogs, and pull ups?

It’s not the lack of mileage that you put into your training schedule that has kept you from reaching your PRs, staying injury-free, or conquering plateauing. More likely than not, it’s that you haven’t unlocked your true athletic potential by adding strength and mobility to your priority list.

The Forgotten Fourth and Fifth Disciplines of Triathlon: Strength and Mobility

Many triathletes fail to realize that by developing strength, power and mobility through cross training, they can enhance their ability to maintain that high-elbow position throughout their swim stroke, keep that high-power output during the last climb before heading into T2, or prevent the dreaded “bonk” associated with form breakdown midway through the run.

Yes, specificity of training is of utmost importance and you have to get in that swim, bike and run mileage to work toward your goals. However, to perform your best—and STAY performing your best—you also have to dedicate time to keeping your body in optimal shape.

To help, here are my top strengthening and mobility exercises. Try incorporating this exercise routine into your training plan, and I think you’ll see a dramatic difference in your performance that will finally shift your mindset on the importance of cross training once and for all.

[one_half]

Top 10 Strengthening Exercises

  1. Squats (back and front)
  2. Deadlifts
  3. SL squats (swiss ball)
  4. Pistol squats
  5. Push ups
  6. Pull ups
  7. Planks
  8. Plank bird dogs
  9. Burpees
  10. Resisted monster walks with OH shoulder press

[/one_half]
[one_half_last]hdr_logo

Click here to access Kevin’s Tri Strength Exercise Program on homeprograms.net

Your Patient Login information:

Your Email: tri.strength@rauschpt.net

Your Clinic ID: 1006

[/one_half_last]

Top Four Mobility Exercises


KCapataKevin Capata, PT, DPT, CSCS is a licensed physical therapist at Rausch Physical Therapy & Sports Performance. After receiving his Doctor of Physical Therapy degree at Columbia University, Kevin started his career at Rausch PT, where he used to work as a physical therapy aide. Now, Kevin enjoys helping his patients recognize and fix movement faults to help them overcome their injury or pain, as well as empowering them with the knowledge and tools to prevent re-injury or potential new injuries.

Click to learn more about Kevin and our other physical therapists »


How to Get Your Body Bike-Ready


The only things cyclists should have to worry about wearing out are their tires—not their joints! Mountain Bike PT Sean shares how to stabilize three key areas of the body to prevent most cycling-related injuries.


BY SEAN SWOPES, PT, DPT, CSCS, RAUSCH PHYSICAL THERAPY

There are certain rules-of-thumb when it comes to the human body and how we are designed to move; our bodies are designed to walk, stand, sit, sleep and eat. Not on that list? Ride a bicycle.

However, that doesn’t stop us humans from having a lot of fun riding them! In fact, with research, experience and continued learning, we can make body and bike work well together. One way is to get a bike fit, which sets up the bike’s geometry to best fit the rider. You can also find a program like Ride Right, which focuses on the rider’s biomechanics. However, the most important (and oft forgotten) step if you’re planning to get into any type of cycling is first getting your body ready to tolerate all the stress it will endure while pedaling, climbing and descending.

As the Mountain Bike PT, I work with a lot of cyclists who deal with chronic pain or injury without realizing that they need to get their body in the correct balance. Like I said, the human body was not designed to be on a bike, but if you focus on and prepare a few key musculoskeletal areas, you can ride for miles without the unwanted stress.

The most commonly injured areas on a cyclist’s body are the knees, back and hips. If you can get your body in an optimal balance of strength and flexibility (also known as stability) in these areas, you can prevent most injuries on the bike.

Sean’s “Bike Bod” Exercise Program

Here are five exercises to help you gain the crucial knee, back and hip stability you need to avoid most cycling-related injuries before you even hop on the bike:

  1. Thoracic extension over a foam roll. The goal of this stretch is to improve the mobility of the thoracic spine to improve the postural alignment of the spine and decrease unnecessary stress to the lumbar spine.
  2. Prayer Stretch (Child’s Pose.) This a truly versatile stretch that can improve your overall mobility. The key is to prevent your lumbar spine from becoming overly-flexed to emphasize maximal mobility out of the hips.
  3. Hand Up Stretch (Couch Stretch.) The focus of this stretch is to improve your quadriceps and hip flexor mobility. The key is to maintain a posterior pelvic tilt (flatten the curvature of your lumbar spine) while sitting up tall.
  4. Squat with a stick overhead. This is not only a great exercise, it’s also an assessment. It will point out the flexibility and lumbopelvic (core) weakness you have.
  5. Dynamic LE warm up: Worlds Greatest Stretch (WGS) and Inchworms. WGS will take every aspect of the body to its end-range to prepare it for what’s to come, while inchworms focus on improving mobility of the entire posterior chain.


*Check back soon for my video explaining more about these five exercises!


Conclusion

As an avid cyclist, the only things you should have to worry about wearing out are your tires—not your joints. By taking the time and doing the work to optimize your body stability, you can defy human nature and adapt your body to your bike so you can continue to enjoy riding for many years, pain-free.


Sean Swopes, PT, DPT, CSCS graduated from CSU Fullerton with a bachelor of science in kinesiology. He went on to receive his doctorate in physical therapy in 2015 from University of St. Augustine, and began his career here at Rausch Physical Therapy and Sports Performance. Sean is also a certified Strength and Conditioning Specialist. As a physical therapist, Sean’s goal is to help his patients understand their musculoskeletal impairments and work together to improve them.

Learn more about Sean and our other physical therapists »

Why Your Daughter is More at Risk for an ACL Tear Than Your Son


One of the more common—and arguably one of the most devastating—injuries a young athlete can sustain is an ACL tear. Diana Wang, PT, DPT, ATC explains what causes ACL injuries and why she believes it’s so crucial for young women to be proactive to prevent this scary setback.


BY DIANA WANG, PT, DPT, ATC, RAUSCH PHYSICAL THERAPY

One of the most common (and arguably one of the most devastating) injuries a young athlete could sustain is an ACL tear. Your ACL, or anterior cruciate ligament, is a part of a team of ligaments in the knee that helps maintain stability and withstand the force/stress from daily movement and physical activity. The main job of the ACL is to limit forward motion of the tibia (the lower leg) on the femur (the upper leg.) The ACL also limits tibial rotation when paired with an angular force at the knee.

What Causes the ACL to Tear?

The ACL limits certain motions, but just like any other soft-tissue structure in the body, there is a limit to its limitations.

While parents often fear their young athlete will get injured from being aggressively slammed in to, the fact is that 70-78% of ACL tears are non-contact, meaning there was no involvement of external forces. The most common mechanisms of ACL tears include:

  • The “plant-and-twist” motion
  • Sudden deceleration
  • Hyperextension of the knee

With that said, athletes in sports that involve repetitive jumping, landing or cutting—such as basketball, soccer and volleyball—are at a higher risk for ACL injuries. And what puts young athletes at even more risk? Being female.

Why Female Athletes are More Vulnerable to ACL Tears than Male Athletes

According to the National Institutes of Health, female athletes are two to eight times more likely to suffer an ACL injury than their male counterparts. Here are three reasons why:

#1: Anatomical differences


Females are born with wider hips than males; because of this, the alignment between the hips and the knee (known as the “Q-angle”) increases and makes females more susceptible to a “knocked knees” posture. This abnormal posture forces more torsion in the internal rotation and adduction angles in an attempt to create more knee stability. This then increases stress on the ACL, thus increasing risk of injury.

#2: Muscle imbalances

In general, most people have a poor quadriceps-to-hamstring ratio. However, females tend to be more quadriceps dominant during functional activity compared to males, especially during deceleration or sudden changes in direction. This quadriceps dominance produces repetitive anterior shear forces of the tibia on the femur, which then increases stress on the ACL to do its job and limit these forces. As I mentioned earlier, there is a limit to its limitations, so if the forces overpower the strength of the ACL, something’s gotta give.

#3: Hormonal changes

During menstrual cycles or hormonal changes (Hello, puberty!), soft-tissue structures tend to loosen up, which decreases overall joint stability and therefore increases risk of injury during that time. Unfortunately this factor is the most uncontrollable, but the prescription of a specific and well-developed exercise program will prepare any young athlete to withstand the stresses of physical activity, regardless of what their body is going through.


How to Decrease the Risk of ACL Injury

Preventative rehabilitation is key to reducing risk of ACL injuries! While you can’t change anatomy, you can train your body to combat instability and the stressors that comes with physical activity. The first step for prevention is to visit a physical therapy clinic and undergo a functional movement screen with a licensed physical therapist. From there, your physical therapist will create an individualized and specialized exercise program focused on mobility and stability tailored to your needs.

Disclaimer: No movement screen will guarantee prevention of injuries. However, they are extremely useful for physical therapists to identify movement faults that may increase risk of injury.


Diana Wang graduated from the University of the Pacific with a bachelor’s degree in Athletic Training. Following graduation, she knew she wanted to pursue her love for sports rehab further and received her Doctor of Physical Therapy degree in 2017 and began her career at Rausch Physical Therapy & Sports Performance. With her extensive sports background, Diana’s goal is to provide the best, most innovative care to get athletes back in the game faster and stronger than ever.

Learn more about Diana and our other physical therapists »

How to Avoid Common Injuries From Doing HIIT Workouts


HIIT, or High Intensity Interval Training, is a popular workout philosophy that promises big results in a short amount of time. However, it also puts its participants at a higher risk for injury. PT Jonathan Meltzer explains how taking a few precautionary steps will allow you to enjoy HIIT workouts safely and effectively.

JM-BLOG
BY JONATHAN MELTZER, DPT, RAUSCH PHYSICAL THERAPY

In recent years, bootcamps, training groups, and other fast-paced workout classes have become increasingly popular, especially in areas like Orange County where we’re all busy, active people (willing to spend on beauty, health and wellness.) Rather than hitting the gym solo, people have started HIIT—High Intensity Interval Training.

Instead of spending hours at the gym, people are flocking to small, local fitness studios or clubs that offer 30 to 60 minutes HIIT workouts, which is various exercises at short intervals. When you add in the bonus of having a coach or instructor leading you through every session, it’s easy to understand why these independent facilities are so popular amongst people looking to transition off the couch.

In fact, the theory of HIIT is brilliant; it gets the heart rate up, combines cardio and strength into one session, and provides variation to avoid workout boredom. For a society that craves immediate gratification, HIIT is great. I myself was a member of a club for more than two years, and it got me in the best shape of my life.

However, as a doctor of physical therapy, I know how to prepare and protect my body for HIIT workouts, and unfortunately I’ve seen too many patients on my table who don’t.

Understanding the Risks of HIIT Workouts

With the increase in popularity of CrossFit, boot camps, etc. came an increase in the number of HIIT-related injuries I saw pop up on my schedule. HIIT has an increased risk of injury compared to lower-intensity workouts, especially for people who have been living a underactive lifestyle prior to jumping into it.

As a shoulder injury specialist, I see patients with rotator cuff sprains, pinching impingement pain and full blown labral tears because their coach put them through 20 minutes of various shoulder exercises, or had them pressing dumbbells into the air over and over just jamming the joint. Others are suffering pain in their knees, lower back stiffness and pain or stiffness in their hips from doing squat/lunge/burpee-type exercises without having first developed proper hip stability to support their body through these intense workouts.

HIIT workouts focus on global stabilization, which means that bigger muscles (those “show me” muscles) get worked a tremendous amount, but too often it’s without proper local stabilization. Just think, it doesn’t make sense to have a nice big house on the beach if the foundation is made of sand—it’ll be washed away in the first storm. However, if you put in the effort and take the time to build up a strong, stable foundation, your beautiful beach house is going to be able to withstand a whole lot more—and look good doing it!

Prepare Your Body to Take the HIIT

While the risks associated with HIIT workout regimens are higher than low-intensity ones, for some people the results are worth it. Like I said earlier, I was in the best shape of my life when I was doing HIIT, but I remember I had the awareness and knowledge to ensure I was doing it safely. Now I make it a point to educate my HIIT-loving patients to keep them healthy and off my table.

Here are the four things I tell anyone who’s thinking about starting or currently doing HIIT workouts:

  1. Get a screen by your physical therapist. Before starting any new exercise routine, you should first get checked by a musculoskeletal professional to ensure your body isn’t vulnerable in areas that are commonly injured during these types of workouts. Not only can your physical therapist identify any impairments of flexibility or strength, s/he can help you address it before diving into a new workout regimen and educate you on how to protect your body once you get going (which will keep you off their table in the long run!)
  2. Listen to your body. Are areas in your body starting to become more sore, tender or not firing the way they should? Usually the body starts to feels slightly different as a warning sign that an injury is about to occur. Being in tune with what you feel in your body will go along way to prevention.
  3. Avoid repetitive movements for the same body part. Performing similar types of exercises repeatedly will continue to wear out the body because you are creating the same movement patterns over and over. Make sure your workout is never hyper-focused on just one muscle group—opt for a total body workout!
  4. Workout with an experienced, certified trainer who knows their stuff. I cannot stress this enough! If you are not evaluated or looked at before you start at a new fitness place, you are setting yourself up for failure. Your trainer or coach needs to be detailed, specific and have a keen eye to watch for over-recruitment and poor form at ALL times.


Conclusion

As a results-driven guy, I’m a big fan of high-intensity interval training, but as a physical therapist I also want people to understand the importance of protecting yourself with the necessary awareness and tools to avoid the alarmingly common traumatic and chronic injuries associated with this type of exercise. Luckily, by being aware of your body and taking a few precautionary steps, you can enjoy HIIT workouts safely and effectively and ultimately get in the best shape of your life.


StaffHeadshot-JonJonathan Meltzer graduated from the University of Redlands with a bachelor of arts in biology and a minor in physical education. Following graduation, Jonathan discovered his passion for physical therapy while working as a Physical Therapy Aide. After graduating top of his class from Loma Linda University in 2012 with a Doctorate in Physical Therapy, Jonathan began his career at Rausch Physical Therapy and Sports Performance. Jonathan’s goals are to identify limitations and treat his patients with the most recent and innovative techniques in order to maximize functional independence and obtain his patients’ individual goals.

Five Myths You Should Disregard When Buying Running Shoes


Getting ready to shop for a new pair of running shoes? DPT Max Biessmann debunks five common myths you encounter when talking shoes and explains what you should pay attention to when shopping for running shoes.

BY MAX BIESSMANN, DPT, RAUSCH PHYSICAL THERAPY
USAT LEVEL I COACH, ASCA LEVEL I COACH, USA SWIMMING COACH


How often have you been to a 5k race or local weekly run and heard different runners comparing and talking about their shoes? There are many things avid runners can and will say about shoes, such as why they run in a certain pair and why that pair is better than any other, but with so many types of running shoes out there to choose from (and just as many opinions) how do you separate fact from fiction?

As a professional triathlete and doctor of physical therapy, I’m going to discuss some common myths I hear about running shoes to help you make a better decision when buying or trying out your next pair.

MYTH #1: Brand “X” is Better than Brand “Y”

I often hear people say they will only run in [insert name of major running shoe brand here] and that [insert name of competitor running shoe brand here] is not as good because of [insert sales pitch here.] Well, this is not entirely true.

Every major brand offers a wide variety of types of shoe to address the multitude of needs of all runners, from beginner to advanced marathoner. With this in mind, it’s not necessarily a specific brand of shoe that will work best for you, but a specific type of shoe. Do you need a lot of motion control? More cushioning? Do you want more road feel? There are types of shoes that can help each of these aspects.

That being said, there are three main features that can really change the shoe and therefore should take precedence in your decision making process: the amount of pronation control, the stack height or cushioning, and the heel toe drop/ramp. Pronation control refers to the amount of support along the inside aspect of your foot/arch and is designed to prevent your foot from collapsing inward into the dreaded over-pronation range. Stack height is the amount of material in between the sole of the shoe and your foot and is often thought of as padding or cushion. Heel toe drop or ramp is the difference in stack height from the heel of the shoe to the toe of the shoe.

If you’re lost as to what type of shoe is best for you, keep these three features in mind and ask an expert. Many running shoe stores will allow you to run in shoes at the store in order to recommend a type of shoe to help get you started in the right direction.

MYTH #2: There’s an Ideal Heel Ramp/Drop for Running Shoes

As mentioned above, the drop or ramp of a shoe is the difference between the stack height of the heel and the toe. The current standard is 10mm, or a heel that is 10mm higher than the toe of the shoe. However, some companies have started advertising a “zero drop shoe” (same height at heel and toe) because higher heel ramps have been blamed for an increase in heel striking and over-striding in runners, leading to an increased injury rate. However, there is currently no sound scientific research to prove that theory. In fact, it can also be argued that since the sole of a shoe compresses under a load, then a zero drop could become a negative drop (basically the heel becomes lower than the toe.)

The truth is that there is no specific standard drop that works best for everyone; the only way to determine the best drop for YOU is to have your gait analyzed by a trained professional. So check the drop of the shoe and find one that works for you; many companies offer ranges of drop from 0mm to 10mm. If you have good success in a specific drop of shoe, be careful not to make a large, sudden change when it’s time to replace that pair.

MYTH #3: There’s a Pair of Running Shoes That Will Make You Faster Although everyone is looking for that one pair of shoes that will magically make them faster, the reality is that the shoes on your feet won’t greatly slow you down or speed you up because they are not performance enhancing in and of themselves. Shoes are a tool that help you complete the necessary training without injury. For example a recent study discovered that adding 100 g (3.5 oz) to shoe weight affected well-trained runners by 1% over a 3k time trial. At 4 min/k (6:25 min/mile) this equates to approximately 7 seconds per 3k. So unless you are looking for those few seconds to win an Olympic gold medal, shoes are not going to make a huge difference overall, and you’re best off in the shoes that are the most comfortable and allow you to train the best without injury or discomfort.

MYTH #4: Shoes With More Padding Prevent Injury

The current trend in running shoes is shifting away from the minimalist movement of a few years ago toward increased padding or stack height. Many people are embracing the increased padding trend, claiming that it will help reduce the load on the joints and, thus, injury rates.

The concept behind this is sound, but good running form and mechanics revolve around being able to absorb and reuse the load to propel the runner forward. Good running form will put about 2.5x your bodyweight of force through your legs; as this force is applied, your legs and entire body must make very quick alterations in muscle activation patterns in order to maintain proper alignment and distribute the loads correctly across the various joints. However, when you run in maximal shoes, or shoes with a lot of padding/stack height, the padding will reduce some of the sensory input from your foot that is required for your brain to maintain the proper alignment. This doesn’t mean that shoes with increased padding are necessarily bad, but they do not prevent injury as some would claim.

MYTH #5: Shoes Change the Way You Run

Shoes can have minor effects on the mechanics within your foot and up through your leg, but the most important part of running form is the way YOU move and your own mobility, strength and motor control. Certain types of shoes or designs can be beneficial in helping you achieve the proper mechanics, but they will not fix anything.

Final Tips

In the end, the selection of a running shoe is a very personal decision and depends on many factors; I hate to be cliche, but there’s really no “one-size-fits-all” answer to running shoes. Here are my final tips and things to remember when purchasing your running shoes:

  • Just because your friend swears by a certain brand or model does not mean it will be the best for you.
  • When looking at running shoes, always take into account your running history, your body type, and your average running surface.
  • It’s important to test any shoe you buy—most running shoe stores will have a treadmill or will let you try the shoes out in front of the store.
  • If you ever see a demo night for a specific brand of shoes, try them out! One of the best things you can do for your running is to play the field with running shoes and try out different designs and models.
  • It is usually best to have several pairs of shoes in your stable to use for different types of runs. Changes in shoe dynamics will change the forces relayed into your foot and body during runs and can reduce overuse injuries.


StaffHeadshot-MaxMax Biessmann, DPT is a licensed physical therapist at Rausch Physical Therapy & Sports Performance. He received his Doctorate of Physical Therapy degree at the University of St. Augustine, San Marcos in 2016 and started his career at Rausch PT. Max is passionate about helping people achieve their goals through physical therapy and innovative rehab technologies. As the Endurance Sports PT, Max says he’s lucky to be able to combine his professional coaching experience and PT knowledge to help his patients achieve their personal bests in sports and daily life.

Learn more about Max and our other physical therapists »


Listen to Jonathan on Angels Baseball Radio


If you’re a parent of a young ball player, you need to hear this.

Baseball PT Jonathan Meltzer joined Dr. Alan Beyer on Doctor in the Dugout Angels Radio AM830 to talk about injury prevention for players of all levels, as well as his views on the controversial issue of youth baseball injuries on the rise in Orange County.


JMAbout Jonathan Meltzer, PT, DPT

Doctor of Physical Therapy Jonathan Meltzer is a licensed orthopedic physical therapist at Rausch Physical Therapy & Sports Performance in Laguna Niguel, Calif. Known as “The Baseball PT,” Jonathan not only specializes in baseball-specific rehab and helping players get back onto the field faster and healthier, but he also advocates for injury prevention and is passionate about combating avoidable overuse injuries plaguing youth baseball athletes. Jonathan’s goals are to identify limitations and treat his patients with the most recent and innovative techniques in order to maximize functional independence and obtain his patients’ individual goals.


Are You Falling for These Four Common Running Form Myths?


Don’t let common running myths hold you back from reaching your full potential, or worse, put you at risk for injury. PT Kevin Capata puts these misconceptions to rest in hopes of changing the way we all think about “perfect” run form.


BY KEVIN CAPATA, DPT, RAUSCH PHYSICAL THERAPY
If you are a runner, treat runners, or even just know someone that runs, you have most likely been involved in the never-ending debate on what is the “correct” way to run. Well, I hate to burst everyone’s bubble, but the truth is this: There is no “one size fits all” answer!

These days, runners come in all shapes and sizes, and they run at various fitness and experience levels; this is why people often come up short on their search for THE best way to run—it really does depend on each individual person. However, that doesn’t mean you can’t figure out a better, more economical, and more efficient way to run depending on your individual body structure and function.

So, to finally abandon this one-size-fits-all approach to “perfect” running form and shift the way the world thinks about running, let’s examine a few common myths and misconceptions that may be holding you back from reaching your full potential, or even causing injuries.

NOTE: All these recommendations are assuming you are healthy with no current injuries. If you are unsure, first make an appointment with your physical therapist to identify and resolve any chronic injury or pain.


Myth #1: Running is a Hobby

First things first, it’s important to understand that running is a sport—not a hobby—which means running requires specific athleticism in terms of strength, balance, range of motion, stability, mobility, etc. As with any sport, developing fundamentals is the key to success. Once you have the fundamentals down pat, variability/adaptability become king!

Take a look at the top 10 jump shooters in the NBA. Each athlete exhibits similar and consistent fundamental motor patterns, form, and mechanics that are essential to being a good basketball player, however each individual also displays slight differences that they’ve found have made them successful. It’s these small variations built on top of the sports’ fundamentals that has set these athletes apart and elevated them to the elite level.

While it may seem totally unrelated, by treating running as a sport and applying this similar concept of developing fundamentally “good” running form, then building on it, you can get faster and prevent running-related injuries. Here are some of the fundamentals you should carry with you on every run:

  1. Maintain an upright posture with slight forward lean from your ankles, NOT from your hips or trunk. Avoid the dreaded “toilet bowl of doom” or “backseat” running postures, especially when fatigue sets in. (Fun tip: if you’re having trouble with this, go for a run where you’re sure to be seen—researchers have found that the majority of runners will straighten up when a runner of the opposite sex is coming towards them ☺)
  2. Land with your foot just in front of your Center of Mass (COM). If you land with your foot directly underneath you, you’re going to fall over, and if you overstride you’ll lose energy, endurance, go slower, and risk multiple lower extremity injuries.
  3. Focus on pushing off from your posterior chain. Yes, those infamous glutes, core and hips. Get your foot off the ground as quick as possible, working on elastic recoil and spring. Think plyometrics and quick, powerful movements. Just like you compress a slinky down and then let it go, this is how we want to think about our legs as we run.
  4. Use your arms. Reciprocal arm swing will help generate power and momentum, as well as maintain your balance and rhythm. Keep a rhythmical arm swing with your shoulders relaxed and elbows brushing up against your hips, not crossing in front of your midline.


Myth #2: Anyone Can/Should Run

Like I mentioned above, running is a sport—not a hobby—meaning not everyone can/should just “hit the ground running.” Now don’t get me wrong, I love running as a way to get in shape, but IF and ONLY IF it’s something that’s gradually (very gradually!) built up to. We live in a time of instant gratification, however the truth is that developing the skill of running, improving strength, and changing motor patterns are habits that take time and hard work. Read any book about building habits or becoming proficient at a skill and I bet it mentions something about “10,000 hours” or “6,000 repetitions” of focused practice to master a specific skill; running is no different.

So listen up! If you a) have never ran competitively before (e.g. high school or college cross-country, track, or other running team), b) have a BMI in the “overweight” category, or c) haven’t been doing cardiovascular fitness training at least three to four times per week for the past two to three months, then you should NOT start running on a consistent basis without first getting individual instruction, coaching, and/or gait analysis. You need to learn how to build your endurance, volume, and intensity overtime, and you should have an expert analyze your current gait and running patterns.

Why is this so important? It’s no coincidence that “running-related” injuries have become so prevalent over the past three decades. Runners used to be predominantly male athletes who ran for competition—skinny guys who were dedicated to the sport and coming in first place. Nowadays, there are more recreational runners who run a marathon just to finish; some are overweight and most are involved in cross-training activities; not to mention that females now make up the slight majority (54%) of runners.

So please, do your body a favor and be patient, take the time to make sure you “get fit to run” before signing up for that first half or full marathon. It will be more fun and rewarding and much less painful if you do.

Myth #3: You Should Run the Same Way Every Time

Efficiency and variability—develop these two attributes as a runner and the rest will take care of itself. The human body is an amazing specimen that adapts to the loads that you place on it, so use that to your advantage! Stand on one leg all day long, and I guarantee you that leg will get stronger and your balance will improve. Change the way in which your foot strikes the ground, and you will be prepared for any surface, incline, decline, or obstacle thrown your way. Again, this takes time! For instance, run some days slow, some days fast, other days both; throw in some hill repeats, some short speed sessions, increase your cadence when you’re feeling good, and slow it down when you’re fatigued.

Myth #4: Cadence is Key

According to numerous studies, the fastest runners take about 90 steps per leg each minute. However, this should not be taken as a stand alone statistic because cadence (or turnover, stride rate, etc.) is a function of an individual’s speed and stride length, as well as physical and cardiovascular capacity. Basically, each person will feel most comfortable and perform optimally at different step rates.

However, it is true that by increasing your cadence you can dampen ground reaction forces, decrease joint loading and impact forces, as well as improve your economy and speed. Therefore, the best thing to do is to either count (or download one of several apps that counts) your average cadence during your run. Play around with going fast, slow, up/down hill, fatigued and energetic, and get an average number. You should be between 160 to 190 steps per minute. If you’re within this range, you can then experiment with increasing and decreasing throughout a run and keep track of what feels most comfortable, what’s less physically taxing over longer distances, and what yields the quickest results. That is the range that your body prefers—assuming all fundamentals listed above are also abided to!

Conclusion

While running mechanics and form can become a complex and heated subject, we have to first and foremost acknowledge the fact that running is a sport and skill that requires time, dedication, and focused practice to achieve results. My main hope is that by taking this approach, we can start to limit the amount of injuries, pain, and suffering that a majority of recreational runners are experiencing on a daily basis.

If you’re still lost and want to take the first steps to becoming a better, faster, and more efficient runner, come in and schedule a Run Right with us at Rausch Physical Therapy & Sports Performance and not just PR your next race, but have fun and be injury free after.


K2Kevin Capata, PT, DPT, CSCS is a licensed physical therapist at Rausch Physical Therapy & Sports Performance. After receiving his Doctor of Physical Therapy degree at Columbia University, Kevin started his career at Rausch PT, where he used to work as a physical therapy aide. Now, Kevin enjoys helping his patients recognize and fix movement faults to help them overcome their injury or pain, as well as empowering them with the knowledge and tools to prevent re-injury or potential new injuries.

Click to learn more about Kevin and our other physical therapists »