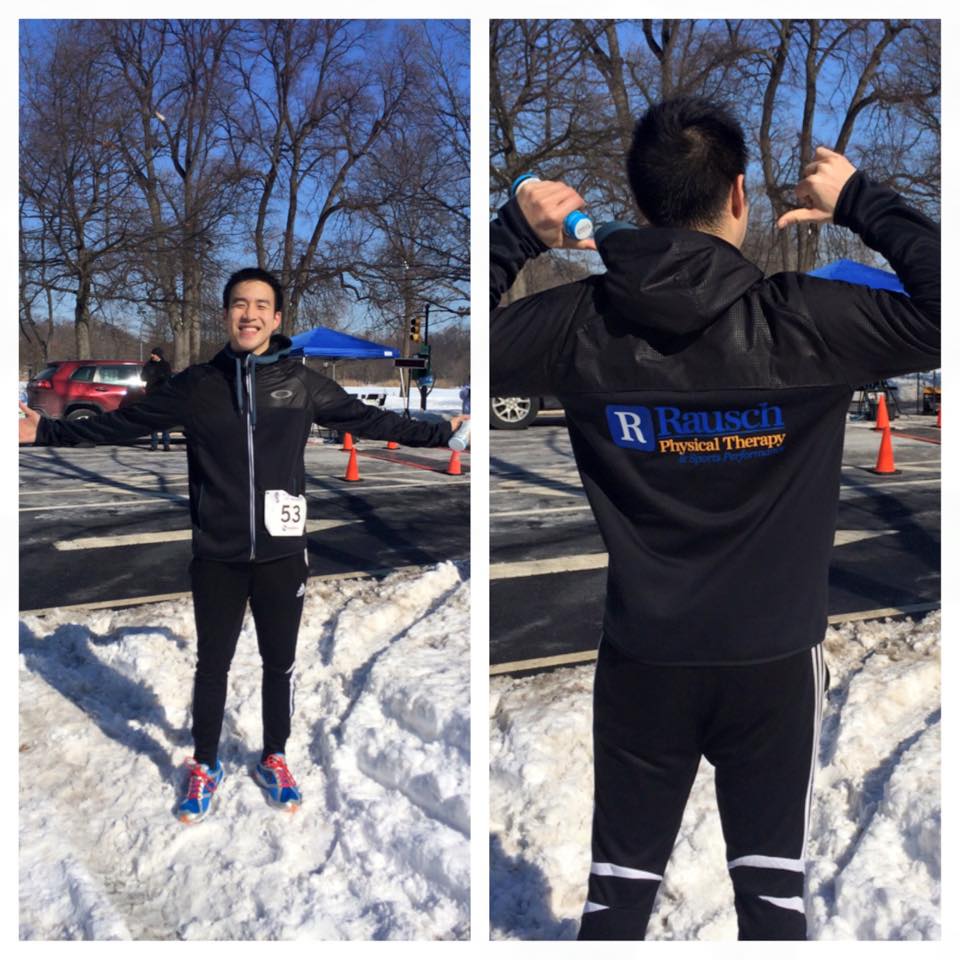
Justin: “Repping proper running mechanics and warmer weather all the way on the East Coast at the NYU Physical Therapy Annual 5k.”
[/one_half][one_half_last]
Kevin: “From the top at 11,053 ft to recovery from the surgery table… This team gets it DONE!”
[/one_half_last]
As much as we love seeing our clients in the clinic, nothing brings us more joy than seeing them out and back to doing what they love. Whether your goal is returning to the golf course, racing your first 5k, or trying to qualify for Kona, we’re here to get you there!
Your screen addiction isn’t just straining your eyes and relationships; over time, your neck muscles can become stretched out and weakened while others become tight and painful as they struggle to stabilize your head in front of your body. Poor posture due to hours of mindless scrolling and tapping could be at the root of the chronic soreness and pain in your head, neck, shoulders, and back. PT Ashley Heller shares her six tips for avoiding the painful condition “Text Neck.”
BY ASHLEY HELLER, PT, MPT, RAUSCH PHYSICAL THERAPY
I constantly notice patients looking down at their phones—texting while in the waiting room, scrolling through Instagram while on the table, checking their work calendar to schedule their next appointment. These days, most everybody relies on their smartphone to stay connected to the world, and almost everyone is guilty of looking down at our phones.
While there’s no question that having technology at our fingertips is entertaining and convenient, it can also be a pain in the neck—literally. So, what can we do to prevent the pain associated with the dreaded “Text Neck?”
What is “Text Neck?”
What many people fail to realize is that repetitive or habitual postures over time related to texting, reading, and working on the computer may lead to long-term effects on the way we feel. Over time, the neck muscles become stretched out and weakened while others become tight and painful as they struggle to stabilize your head in front of your body. Poor posture over a prolonged period of time can lead to postural dysfunction resulting in chronic soreness and pain in your head, neck, shoulders, and back.
[one_half]
What’s the science?
Postural syndrome occurs when prolonged stress is placed on the neck
The average human head weighs 10-12 pounds in a neutral position
The further bent forward your head is, the more weight your neck has to support:
15º = 27 pounds
30º = 40 pounds
45º = 49 pounds
60º = 60 pounds
[/one_half][one_half_last]
Symptoms of Text Neck
Headaches or migraines
Pain in neck and or between the shoulder blades
Numbness or tingling down the arm
Shoulder pain
[/one_half_last]
Long-term effects of Text Neck
Prolonged posture strains your neck muscles and cervical facet joints, resulting in soreness and inflammation in that area. It also flattens the normal curve of your neck, which can lead to:
Headaches
Nerve pain in neck or arms
Disc degeneration or herniations
Arthritis resulting in neck stiffness, as well as arthritis in the neck joints
Text Neck also can also cause a rounded shoulders posture, which can affect the mechanics of the shoulder and may result in shoulder impingement. You’re also more susceptible to a condition called Upper Crossed Syndrome, which occurs when the muscles in the neck, shoulders, and chest become deformed causing things like a hunched back or chronic shoulder, upper back and neck pain.
Six ways to combat and avoid Text Neck
The good news is that it’s not too late to make changes to undo any damage your screen addiction may be inflicting on your body. These tips can also apply while reading or working on your computer or tablet.
Be aware of your posture. Pay attention to the way you are sitting or standing and how long you have been in that position.
Listen to your body. When you feel neck pain starting, correct your posture immediately by getting out of a slumped position, then find a neutral spine posture by sitting upright while aligning your ears with your shoulders.
Bring your phone up to eye level to reduce strain to your neck while you are texting.
Text with your arms supported to decrease strain to the neck.
Don’t stay in one position for too long. You now know that prolonged postures can lead to muscle strains, so get up and move around! You should also use a foam roll, tennis ball or lacrosse ball to decrease tissue tension in your upper back.
See a physical therapist. If you’re already feeling the painful symptoms of Text Neck in your neck, upper back or shoulders, schedule an appointment with a physical therapist. We’re experts in musculoskeletal dysfunction, and we can create a specific plan of care combining manual therapy and therapeutic exercises to help you find relief and change your texting habits for good.
Ashley Heller, MPT is a licensed physical therapist at Rausch Physical Therapy & Sports Performance. She received her Masters of Physical Therapy degree at California State University, Long Beach and is passionate about working with patients with shoulder, knee and ankle injuries. With background in orthopedic-related injuries and post-operative rehabilitation, Ashley believes that the combination of manual therapy and personalized therapeutic exercise program is vital to recovery. Known as the Water Sports PT, Ashley says her goal is to help her patients better understand their injuries and the plan for their road to recovery.
Did you know there’s no prescription needed from a doctor to see us – but we will communicate your progress and treatment to your doctor if you’d like us too!
(949) 276-5401
Disclaimer — All the information that you find on our blogs and social media pages are for informational purposes only and are not intended to be used as your personal professional diagnosis, or treatment. Come and see us for your excellent, personalized care!https://staging.rauschpt.net/
Injury prevention is a top concern for many young players whose goals of playing college or professional baseball rely on them staying healthy. “The Baseball PT” Jonathan Meltzer, DPT shares his four tips for proper arm and body care and maintenance to help youth overhead athletes achieve a long, healthy career.
BY JONATHAN MELTZER, DPT, RAUSCH PHYSICAL THERAPY
So, you want to play baseball at the next level? Whether that means making a college team or making it to the show, the opportunities to play at a higher level are there for the taking, but it requires significant diligence, dedication and talent. It also takes training and—most importantly—you have to stay healthy.
One of the biggest big league dream killers is injury. You see it time and again; a high school player ignores an injury he suffered playing club ball as a kid, and now when it’s time for scouts and coaches to evaluate his skill, he’s stuck in the dugout on the disabled list.
As a physical therapist, nothing makes me prouder than when I help a young ballplayer rehabilitate from a potentially career-ending injury, and he then goes on to achieve his goal of playing college baseball. By taking care of your body and implementing a specific strength training program, injuries are much less likely to occur, and you can greatly expand your career longevity.
Here are four tips for getting your arm and body in the most efficient shape possible so that injuries don’t keep you from playing ball at the next level.
#1 – Be Honest
First and foremost, you have to be honest about your symptoms. Ask yourself, “Do I feel pain, discomfort, or soreness anywhere in my body that doesn’t seem to go away?” Answering yourself honestly and being able to accept that something “just doesn’t feel right” is the first step in injury prevention.
If you do notice any minor aches, pains or soreness that doesn’t seem to go away, you need to get it checked out by your physical therapist or sports physician. For example, as “the Baseball PT,” I always perform a full biomechanical analysis and assessment of the entire “baseball body” when a player comes to see me about some “minor” pain. Trust me when I say something small will usually develop into a more serious injury because of the repetitive nature of baseball mechanics (i.e. pitching, throwing and hitting.)
FOR PARENTS/COACHES: If your player is trying to be honest with you about pain, LISTEN TO HIM. I cannot tell you how many times an overzealous parent or coach will push their kid to play through pain and soreness because a scout might be in the stands, only to cause permanent damage that ends their kid’s baseball career while he’s still a teenager.
#2 – Take Care of Your Tissues
Once recognizing some ache, pain or soreness, you need to start preventative care with consistent soft tissue work. For this, I recommend every one of my athletes to get a lacrosse ball or baseball. You can either lay or stand with the ball pressed against your back/shoulder and some hard surface. Any sore or tender spots you find means there are restrictions there that must be worked out before and after every practice and game. Another great soft-tissue mobilization tool–particularly for your upper back and lats–is a foam roller. Again, you should foam roll before and after every practice and game to keep the rotational component of your body loose.
#3 – Stretch the Proper Way
Take note because this is very important: we DO NOT want to static stretch prior to performance. When you static stretch (e.g. hold arm across body, pec stretch holding on to fence, hamstring stretch, etc.) all you’re doing is tricking your brain into thinking your tissues are lengthening (i.e. getting loose) when in reality, they’re not. Your brain has told your body it’s warmed up and ready to go, but actually the tissue is still stiff and not properly prepared for action, which is what can lead to injury. Static stretching also negatively effects your performance, as research shows that it leads to a nine percent decrease in strength for up to an hour afterwards (obviously not ideal before a game.)
Instead, before every practice and game you need to perform a dynamic warm up, which mimics the movements you’ll actually be doing while playing ball, such as active wrist movements, dynamic hugs, and throwing position rotation.
Finally, the last piece to get us to the next level and help prevent injuries is a proper strength training program. However, in this case* I’m not just talking about strengthening the arm, but rather the entire body. I really can’t emphasize enough how important it is for baseball players to work on their shoulder stabilizers to improve their back, core and lower-half strength, as well as balance.
[framedbox]*PLEASE NOTE that my Dynamic Baseball Warm Up mentioned in #3 also includes an arm strength exercise program, to be performed prior to every practice and game to dynamically warm up the arm before use. Stay tuned for part two of the above video, “Dynamic Baseball Warm Up (Part 2): ARM STRENGTH & BANDS,” coming soon![/framedbox]
So, as you continue to put in the work to achieve your dream of playing baseball at the next level, just remember that consistency is key. Professional athletes are all known for their consistent drive and dedication, and with that dedication comes an intense focus on daily body health maintenance. The fact is that if you’re consistent with your daily recovery routine and if you start listening to your body, you will perform better, and ultimately your shot at playing baseball at the next level is as good as anyone’s.
Jonathan Meltzer graduated from the University of Redlands with a bachelor of arts in biology and a minor in physical education. Following graduation, Jonathan discovered his passion for physical therapy while working as a Physical Therapy Aide. After graduating top of his class from Loma Linda University in 2012 with a Doctorate in Physical Therapy, Jonathan began his career at Rausch Physical Therapy and Sports Performance. Jonathan’s goals are to identify limitations and treat his patients with the most recent and innovative techniques in order to maximize functional independence and obtain his patients’ individual goals.
We all have our own ways of coping with grief, especially when it comes to injury. Attitude can have a huge effect on your perception, your outlook and your overall motivation to get better. Most of us are familiar with Kübler-Ross’s Five Stages of Grief, however many people don’t realize how applicable it is to the injury, rehabilitation and recovery process.
While not everyone experiences all of these stages, each patient certainly goes through denial, anger, bargaining, depression and/or acceptance at some point when recovering from a big injury. As a physical therapist, I’ve seen firsthand how injury rehab can be just as tough mentally as it is physically, and sometimes even more so. By recognizing and understanding how the stages of grief manifest during your recovery after an injury or surgery, you can take control of your mental well-being and make physical therapy less stressful and more successful.
Stage 1: Denial
What it looks like:
You deny the severity of your injury by telling yourself, “It’s not that bad.”
You try to seek out the “quick fix” to get back to what you love doing as soon as possible.
You avoid going to the doctor because you don’t want to hear bad news, or you seek second and third opinions because the doctors are telling you something you don’t want to hear.
You assure yourself you can fix the pain on your own, saying, “I got this, I don’t need any help, just have to rest for a few days…”
What you can do:
Stop wasting time and get a diagnosis. If an injury does not get better in one month, stop putting off your recovery and go get it checked out by your physician or physical therapist. Getting a diagnosis is the first crucial step in moving forward with your recovery and feeling better, so why wait?
Stage 2: Anger
What it looks like:
You’re angry that you can’t play your sport or do your normal activities because of pain.
You may need help doing everyday tasks, and you’re upset that you’ve lost your independence.
You’re a frustrated athlete and you think, “This is taking too long, I have a big game next week!”
What you can do:
Stay positive. Lean on your support system—between your family and friends, your doctor, your physical therapist and your physical therapy aides, you are not alone. I constantly remind my patients, “I know this is difficult, but I’m in this with you. We are here to help, we are here to listen, and we are here to get you there.” When you’re angry and frustrated, avoid being impulsive, giving up on the rehab process, or comparing yourself to other patients who may be progressing quicker than you. Trust the process, and trust your physical therapist.
Stage 3: Bargaining
Typically, athletes are not the most patient patients, as they often experience pressure from coaches, parents, teammates, and themselves to return to playing as quickly as possible.
What it looks like:
Obsessively asking, “When can I go back to playing?”
Looking for the quick fix, cutting corners, or simply pushing through pain
Asking “What else can I do to recover faster?” instead of taking the time to focus on a full, complete recovery
Getting stuck in the bargaining stage can be detrimental to a successful recovery because you will either prolong or cut the process short, ultimately resulting in re-injury, chronic pain, or even bigger issues in the future.
What you can do:
Be patient! Establish a cohesive plan with your physical therapist that consists of smaller, achievable goals as steps towards your ultimate goal. It’s also important to be consistent with your physical therapy program and at-home exercises to continue progressing forward.
Stage 4: Depression
While recovering from an injury or surgery, patients may fall into some level of depression as they face new challenges, such as losing your independence after surgery or losing your sense of self if you’re an athlete.
What it looks like:
Feeling helpless.
Feeling hopeless or doubtful; thoughts of, “Will this ever get better?”
Fear of letting your parents, coaches, or team down.
Experiencing post-traumatic stress disorder (PTSD), or being afraid of re-injury.
What you can do:
Ask questions. Be an active participant in your recovery by educating yourself to better understand your injury and the specific recovery process for that injury. This will empower you, as well as help you be patient and trust in the process. Understanding the “What, Why, and How”s is key to compliance and success.
Ask for help. It’s imperative to recognize these thoughts or feelings of depressoin, and to address them with your physical therapist and/or someone you trust.
Stage 5: Acceptance
What it looks like:
No two injuries or recoveries are identical, as every person is different and there are many factors that influence recovery process. Taking responsibility of your recovery is empowering and motivating.
Coming to terms with where your body is currently during your recovery.
No longer comparing yourself to others.
Accepting of where you are at in your own process and focused on moving forward.
What you can do:
Take charge of your recovery. Consistency is the key to success; progress in injury rehabilitation requires consistency with regular physical therapy sessions in addition to doing your exercises independently at home. Take advantage of the tools available to you to manage your recovery daily, and you’ll be back to your regular activity before you know it.
Staying Healthy Mentally While Recovering Physically
Suffering from an injury can have a negative impact on your attitude and mental health, which left unchecked can effect your performance and success when trying to heal. Being honest with yourself and maintaining a positive attitude after any injury or surgery will greatly increase your chance of a full, successful recovery and ultimately help you grow as an individual.
Ashley Heller, MPT is a licensed physical therapist at Rausch Physical Therapy & Sports Performance. She received her Masters of Physical Therapy degree at California State University, Long Beach and is passionate about working with patients with shoulder, knee and ankle injuries. With background in orthopedic-related injuries and post-operative rehabilitation, Ashley believes that the combination of manual therapy and personalized therapeutic exercise program is vital to recovery. Known as the Water Sports PT, Ashley says her goal is to help her patients better understand their injuries and the plan for their road to recovery.
This post has an accompanying article, “This Soft-Tissue Maintenance Routine Will Keep You On Your Bike Longer.” Click here to read it now on the Over the Hump blog.
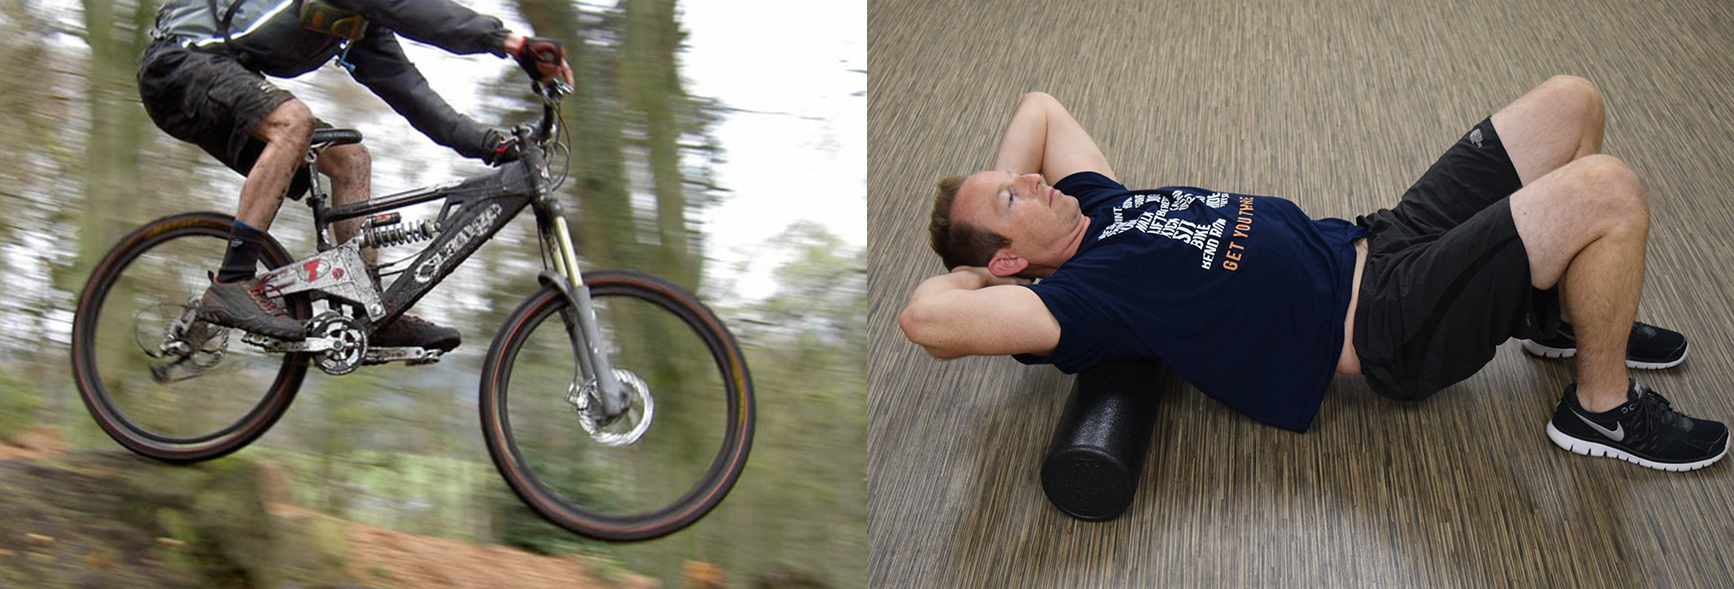
As mountain bikers, we put our bodies through the ringer. Introducing a soft-tissue mobilization technique like foam rolling can help you avoid limiting aches and pains so you can stay on the bike longer, train harder, and reduce your recovery time.
Recovery and maintenance programs aren’t always convenient, but I personally make it a point to implement them in my training to ensure I get to join the riding group every weekend and race stronger at Over the Hump. The daily grind takes a big toll on our bodies and will cause imbalances, whether it’s from poor posture at your desk, lack of cross training or focusing too much on strength training. This is why it’s critical for all MTB riders to actively pursue some form of mobility maintenance routine to keep their bodies balanced and their seat on the trails.
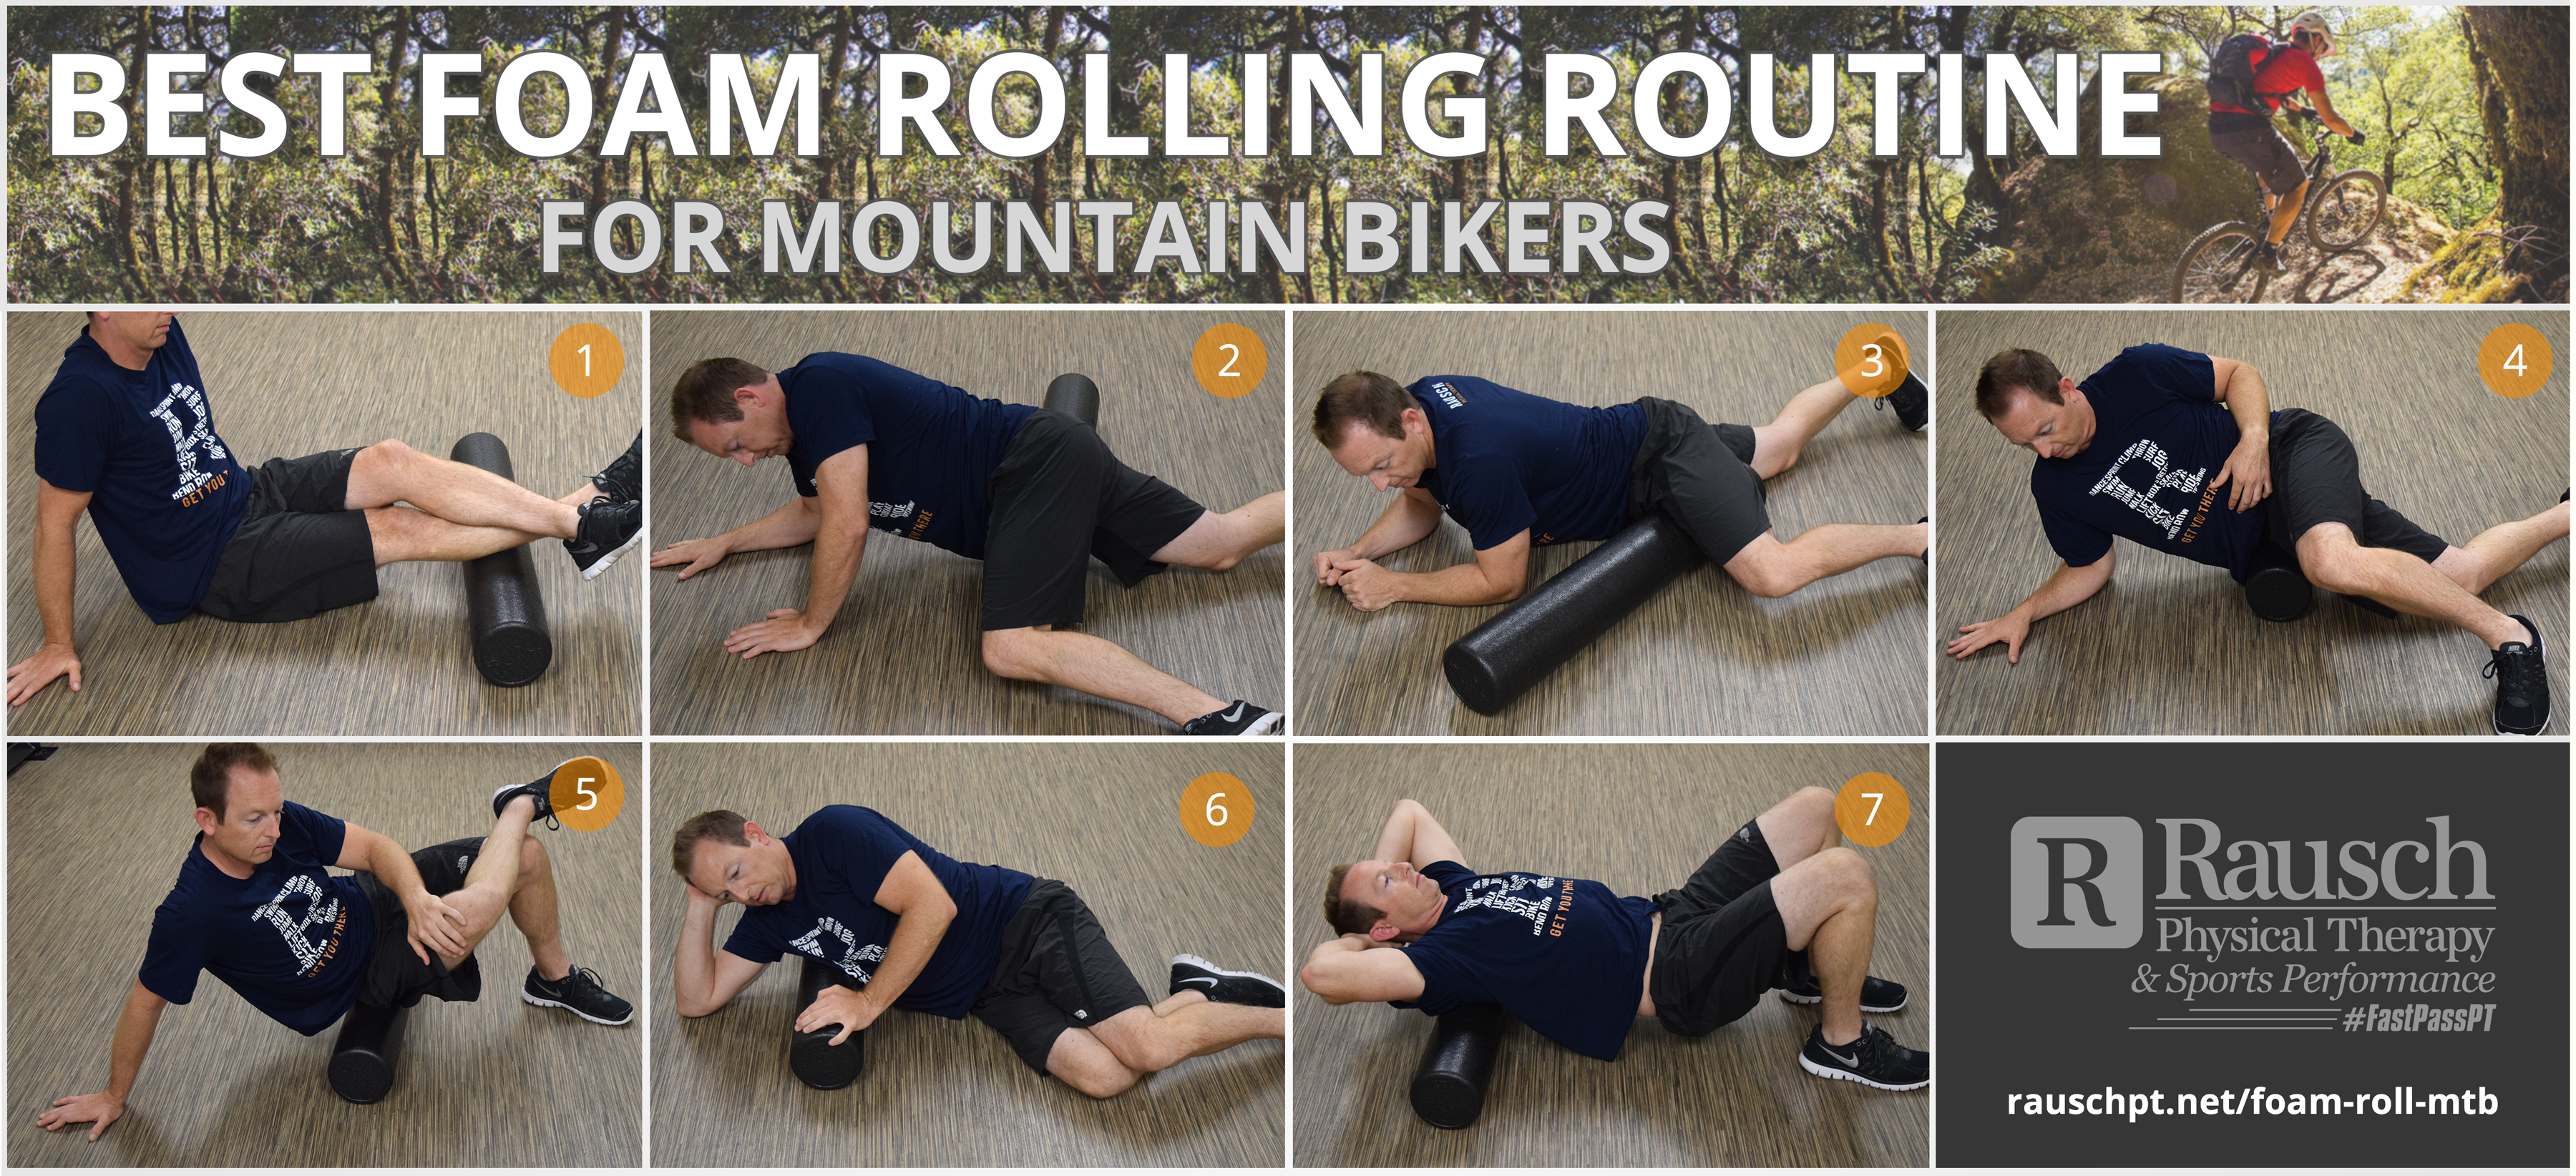
Best Foam Rolling Routines for Mountain Bikers
When you feel sore after you train hard or go for a long ride, it’s because your muscles are literally tearing apart to restructure fiber alignment for greater tolerance to that stress. This microfiber tearing will cause a formation of more cross-links so that you become stronger (Good!) However, if you don’t then work on those specific tissues after training—say, with a foam roller—they’ll become glued down in a mal-aligned direction, and you’ll lose mobility (Bad.)
The foam roller is one of my favorite tools for working out your muscle and tissue on a routine basis; it’s cheap, easy, and you can do it yourself. Ideally, you should spend time working out the tissues that are tight for five to 10 minutes daily, or until you feel about a 50% reduction in pain. After a long ride, you should also spend a little extra time focusing on the areas you worked hard.
Here are the muscles I specifically attack with the foam roller after every mountain bike ride:
Tensor fasciae latae (TFL).Helps work the IT band and hip flexor complex)
Gluteals/piriformis
Latissimus dorsi
Thoracic Spine extension. Great for avoiding the dreaded Rounded Shoulder posture.
* PRO TIP: When foam rolling, focus on going across the tissue fibers (i.e. laterally rather than up and down.) This lateral rolling will emphasis on “going against the grain” and most mimics a manual therapy technique called cross friction. This will restructure the muscle fiber alignment and keeps things sliding-and-gliding freely.
By incorporating the foam roller into your daily routine, you can reduce your risk of injuries, improve recovery time and overall athleticism—best of all, it will help you feel less old! So be specific, be consistent, and respect mobility with cross friction-based foam rolling.
This post has an accompanying article, “This Soft-Tissue Maintenance Routine Will Keep You On Your Bike Longer.” Click here to read it now on the Over the Hump blog.
Dustin Hancock, DPT graduated from San Diego State University with a bachelor’s degree in kinesiology/nutrition. He went on to receive his doctorate in physical therapy in 2011 from University of St. Augustine, and began his career at Rausch Physical Therapy and Sports Performance in 2012. As a snowboarder and mountain bike enthusiast, Dustin specializes in treating extreme sport athletes. As a physical therapist, Dustin says he looks forward to being a companion every step of the way on his patient’s path to recovery.
In my blog “How to Keep Injuries from Killing Your Big League Dreams,” I discuss four ways youth baseball players can take better care of their bodies and get in the most efficient shape possible so that injuries don’t keep them from playing ball at the next level. One of these ways is to implement a global strength program into your training regimen, which emphasizes building entire body strength rather than simply focusing on your throwing arm.
The Best Exercises for Building Entire-Body Strength
A proper strength training program will not only will this improve your overall athletic performance, but it will also help you to avoid the common overuse injuries that are plaguing youth sports today. However, I’m not just talking about strengthening the arm, but rather the entire body. I really can’t emphasize enough how important it is for baseball players to work on their shoulder stabilizers to improve their back, core and lower-half strength, as well as balance.
Here are my four favorite stabilization and strength training exercises for preventing injuries:
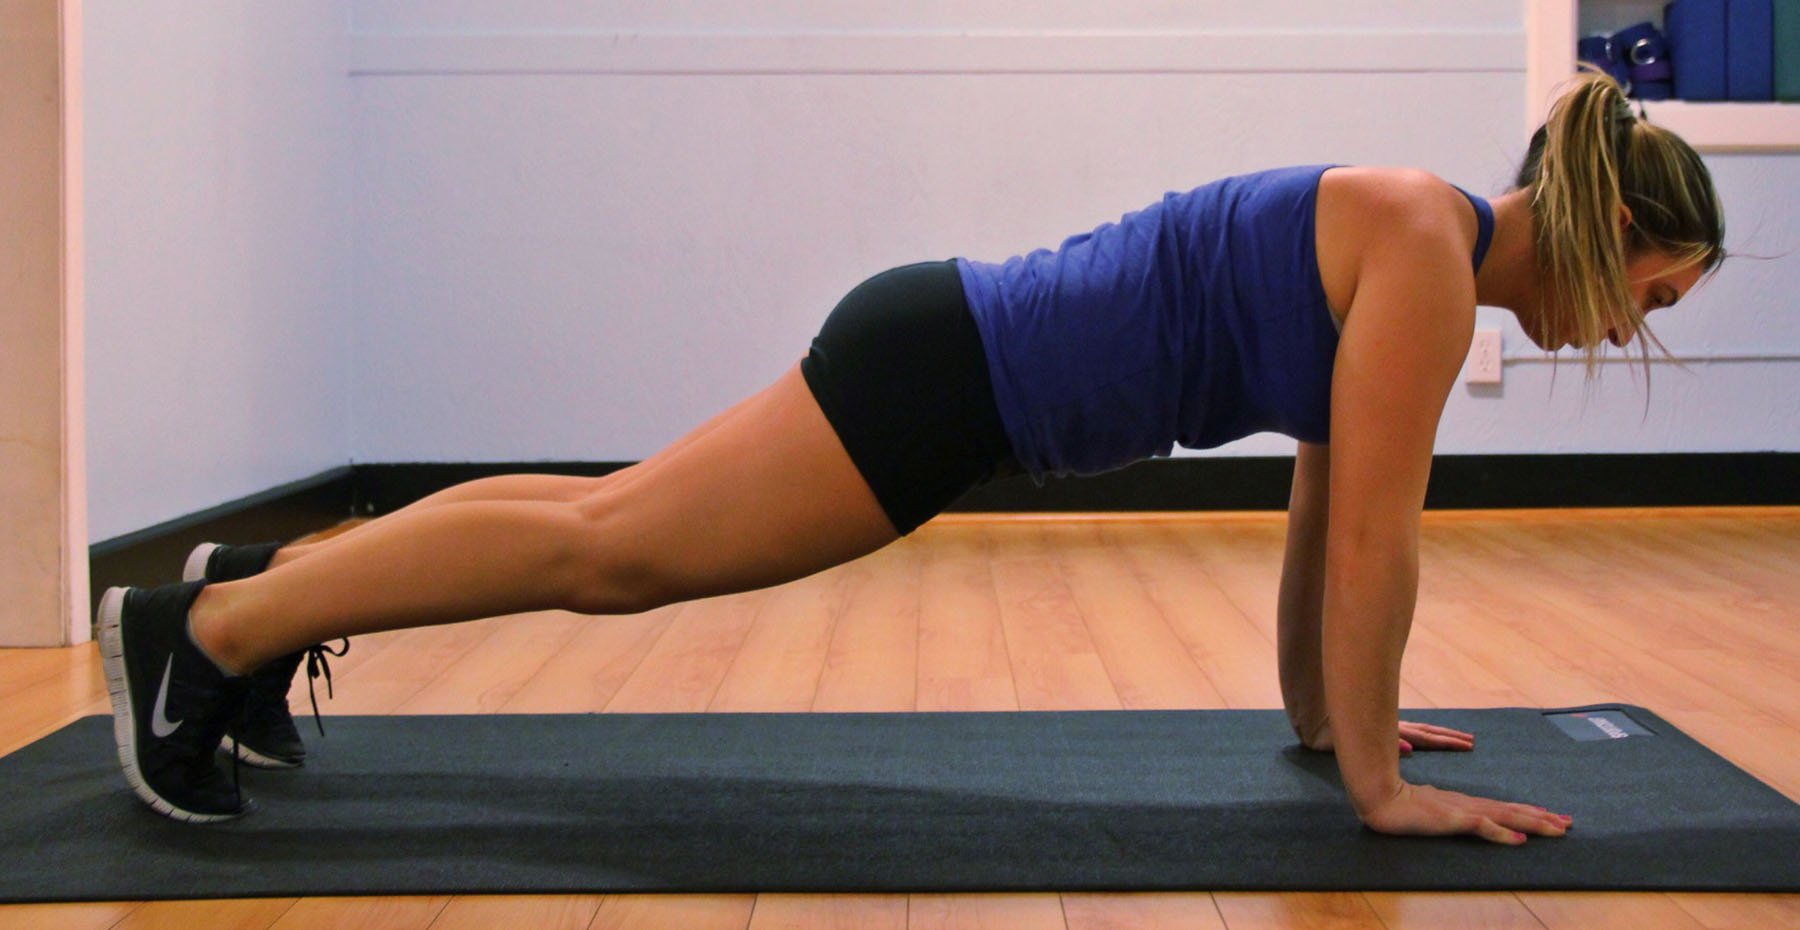
1. Planks
Planks are great for total body stabilization and core. Perform this plank series every day to increase your strength.
Front Plank – Hold for 45 seconds.
Side Planks – Hold for 45 seconds on each side.
2. I.T.W.Y. on Swiss Ball with Weights
For this exercise you’ll need 1, 2 and a 3 lbs. dumbbells and a swiss ball. As you move through the sequence below, keep your abs tight and lifted so your back is flat. Perform 2 sets x 15 reps (2 x 15).
” I – 3 lbs. weight”
” T – 1 lbs. weight”
” W – 2 lbs. weight”
” Y – No weight”
3. Side-Lying Dumbbell Pyramid
To perform this series, lay on your side with 1, 2 and 3 lbs. dumbbells in front of you. Place a rolled towel between on your side and top arm, just below the elbow. Grab the 3 lbs. dumbell first, and lift up and down, keeping the elbow glued to the hip and shoulder blades squeezed together. Do 30 lifts or until fatigue, then move to the next lowest weight, repeating the same movements. Once you have completed reps with each dumbbell, roll over and do the other arm.
3 lbs. weight first.
lbs. weight.
Finish up with the 1 lb. weight, then switch sides.
4. Swiss Ball Core Series
This tricky series will strengthen your core and improve your balance.
Roll down the ball until you’re in a plank position, then do a push up. (2 x 15)
Tuck knees toward your chest. (2 x 15)
Lift your hips into the pike position. (2 x 15)
By implementing these four exercises into your current strength training program, you can begin to greatly improve your entire-body strength and stability, two very important keys to athletic success and a long, healthy baseball career.
Jonathan Meltzer graduated from the University of Redlands with a bachelor of arts in biology and a minor in physical education. Following graduation, Jonathan discovered his passion for physical therapy while working as a Physical Therapy Aide. After graduating top of his class from Loma Linda University in 2012 with a Doctorate in Physical Therapy, Jonathan began his career at Rausch Physical Therapy and Sports Performance. Jonathan’s goals are to identify limitations and treat his patients with the most recent and innovative techniques in order to maximize functional independence and obtain his patients’ individual goals.
BY LYNDSAY DEFILIPPO, DPT, RAUSCH PHYSICAL THERAPY
If you have ever undergone physical therapy, chances are that at one time or another you have received a home exercise program (HEP) from your therapist. As a physical therapist, I do my best to stress to my patients how crucial HEPs are to their recovery, but despite my best efforts I’ve found that only a small percentage of patients ever complete their program. And I get it! The whole reason you schedule a PT appointment is so you can focus on your recovery for a solid hour because outside those clinic doors you have a busy life and schedule. Sure you’ll plan to do your HEP after work, or after you put the kids to sleep, or before bed, or you’ll wake up early tomorrow… but slowly it disappears off the “to-do” list. Unfortunately when that happens, your recovery ebbs and flows instead of you making continued progress.
So, stop sabotaging your recovery! Completing your HEP will aid in a quicker, more successful long-term recovery. Once you’ve decided to commit yourself to your health, wellness and recovery, it’s actually very easy to incorporate a program into your daily routine, even with the busiest of schedules and with little to no equipment.
I’ve made a list of the four most common HEP-related complaints I hear on a daily basis, as well as some accompanying tips and tricks on how to stay compliant with your HEP simply by getting creative and making the choice to commit to YOU!
Complaint 1: I don’t have time to perform the program every day.
Solution: Incorporate portions of your program throughout your day.
If you don’t have time to complete all your exercises in one sitting, try spreading them throughout the day instead. Practice your single leg balance, heel raises, toe yoga, arch lifts, etc. while brushing your teeth. While you’re waiting in line for your morning coffee, stuck in traffic, or taking a break from the computer, do your chin tucks, neck stretches, or shoulder squeezes. If you’re a student and are unable to participate in the demands of gym class or sports because of your injury, perform your home program during practice/class time. Finding those little spaces in your day to sneak in an exercise or two will ensure you are keeping up with your program—without jeopardizing your free time.
Complaint 2: There are just so many exercises…
Solution: Ask your PT to prioritize your exercise list.
As you get better and are able to do more, your HEP also progresses and consequently might seem more lengthy than it was in the first few sessions. I find that a huge list of exercises often gives patients anxiety, which is one of the reasons I tend to start my patients off with two to three exercises, then build accordingly. Although the basic fundamentals are always important as they are your building blocks, you can discuss with your therapist the most important exercises for you to complete at your current status and break them up throughout the day.
Complaint 3: How am I supposed to perform the exercises if I don’t have the equipment!?
Solution: Not all exercises require the exact equipment we have at the clinic—get creative!
By substituting in household items, you can still target certain muscle groups and movements and ensure you continue making progress without any clinical equipment. For example:
Clinic Equipment
Household Substitute
STRETCH OUT STRAP
Yoga strap, dog leash, belt from a bathrobe, regular belt, or long beach towel
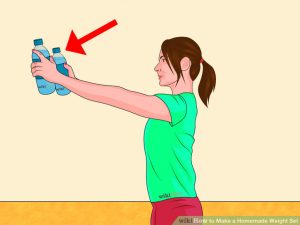
1 LB. WEIGHT
Full water bottle or soup can
CABLE COLUMN
Resistance bands strapped over a door
FOAM MAT
Bath towel folded multiple times or a pillow on a carpeted or secure surface
(Avoid placing on slick surfaces to decrease your chances of slipping!)
CUFF WEIGHT
Insert a soup can or other weighted object in a purse or small bag; hang off your ankle for leg lifts, knee extensions, etc.
SLIDERS
Washcloth or towel on a hardwood floor
CALF SLANT BOARD
Using a yoga strap/leash/belt/towel, perform the calf stretches in sitting position
**IMPORTANT** As with all exercise safety, please ask your therapist if you can substitute equipment, as this blog is only a recommendation and does not apply to all medical cases.
Complaint 4: I’m going on a work trip/vacation, so I won’t be able to do my HEP
Solution: Home exercise programs are designed to be done anywhere.
Most clinics will give you a print out of your home exercise program sheet, or in our clinic’s case, make it accessible online at homeprograms.net. This means that your HEP is accessible anywhere.The substitutions above are also great ways to stick to your program while you’re traveling, as most hotels offer water bottles, bathrobes with belts, towels, etc.
With summer coming up, incorporate and utilize your environment.
If your family lives in the pool all summer… Ask your PT if you would benefit from a water program.
Heading on a tropical vacation? Sand acts as an unstable/uneven surface to promote balance and proprioceptive training.
If your trip requires a long flight… It’s always good to incorporate a program to avoid prolonged sitting and potential for blood clots, such as frequent walking breaks, ankle pumps, heel raises, marching in place, etc.
BONUS QUESTION! BUT, if I were to purchase items, which do you recommend most?
Depending on the injury you are recovering from and the outlined program that your PT has developed for you, a few must have items I would recommend for continued health include:
Foam roller
Lacrosse ball
Stretch out strap
Portable resistance-style bands
At the end of the day, your PT cares about your recovery and s/he would not personally create your individualized home program if s/he didn’t think it would be beneficial. It’s important to also invest in your health and take all aspects of recovery seriously. Like all things, once you make the changes and incorporate your exercises into daily life, it will become routine and therefore easier to adhere to on a daily basis. You will also reap the rewards, and return to the things you love most that have inevitably been altered since your injury.
Lyndsay DeFilippo PT, DPT, CKTP received her Doctorate of Physical Therapy from New York University in 2010. She’s a Graston Practitioner and a Certified Kinesiotaping Practitioner. Lyndsay looks at each injury as a constantly changing puzzle, which is only solved when her patient returns to what s/he loves doing. She enjoys helping with the full recovery process, which includes providing the education, tools and fundamentals to prevent re-injury and the potential for new injuries.
After falling from 14 feet in the air, Todd Clarke was quite lucky to be alive. It was the following series of happenstance that led Todd to his perfect physical therapist, and with that a renewed appreciation for his body and its wellness.
On December 3, 2015, Todd Clarke was hanging Christmas lights on the roof of his Laguna Niguel home when an ill-fated step sent him plummeting to the ground. Luckily Todd survived, however he did suffer a concussion, tears in his shoulder, and about 30 bone fractures in both wrists and thumbs, face, skull and spine. After surgery and an eight-day stay in the hospital, Todd, a husband and father of two, was just grateful to be home in time for Christmas. Still, the accident left him unable to drive or go back to work as a teacher and multi-sport coach, and all together Todd was on disability for five months.
At about six weeks after his accident, Todd started physical therapy out of his orthopedic doctor’s office, focusing on treatment to restore function in his hands and shoulder so he could begin to take care of himself again. However, as time went on the nature of Todd’s true injuries became more apparent and unpredictable, and his focus shifted from his obvious hand and wrist injuries to the pain and stiffness in his neck and back. He also began experiencing vertigo, as the concussion he suffered caused lingering issues in the form of BPPV. Todd says that the “ever-changing landscape” of his injuries required a change in PTs, since his previous PT didn’t have a neck or back specialist on staff.
So, as soon as his hand and wrist function improved, Todd hopped on his computer to research local physical therapy clinics, which is when he stumbled upon Rausch Physical Therapy & Sports Performance. With seven physical therapists on staff, Todd had a 14% chance of being matched with Ashley Heller, MPT, but Todd says he’s glad he wound up on her table by happenstance.
It was seemingly an innate connection that led the two down a path of discovery littered with fun coincidences: Ashley had attended sixth grade at the same school where Todd was a fifth grade teacher; both attended UCSD and have a passion for surfing; they even share the same birthday!
“If Ashley was not friendly and thoughtful, we would have never had the conversations that led us to discover these wonderful connections,” Todd said.
Fueled by their fateful bond, these two kindred spirits have been hard at work to get Todd back to 100%, although with the multitude of his injuries Todd says this will likely take at least a year to fully recover. However, Todd has made great progress in just a short time; in the two months since starting treatment with Ashley, Todd says he hasn’t had any dizziness or balance issues from BPPV, which has allowed him to do what he loves most: spending time with his wife and two children. Todd is also back to doing most of the activities he enjoys, such as golfing, surfing, hiking, playing guitar and volleyball—and yes—even doing a few handy projects around the house.
“The best part [of PT at Rausch Physical Therapy] has been seeing positive results in my body and awakening the desire to be physically fit again,” he said. “Ironically, I am more active and feel healthier than I have in 10 years.”
In the end, Todd is lucky he survived his fall, it was chance he was matched up with his PT Ashley, and we’re very fortunate to have him as a client and to be a part of his recovery written in the stars.
“Heaven forbid it, but if I ever need PT again, Rausch PT will be the first place I go and I’ll look forward to going… as strange as that sounds.”
Hi, I’m Jessica, and I’m a doctor of physical therapy.
Rausch PT physical therapist Jessica Snyder receiving her doctorate in physical therapy in 2012.
As a licensed DPT, I treat many high school-aged patients (or their parents) who will often ask me what it takes to become a physical therapist. Since June is graduation month and there are thousands of high school students out there wrapping up one chapter of their life and looking to the next, let’s talk career planning and professional education for the field of physical therapy.
The Path to Becoming a Physical Therapist
Before you can even start down this career path, you must first complete your undergraduate education. After that, you’re on to… yep, more school! “PT school” is a graduate-level program that typically takes three years to complete. However, just like any other graduate program, getting in to PT school is a tough process. So, set yourself up for success and research the requirements for different PT schools while you’re still an undergrad.
Generally, all PT schools will require:
Bachelor’s Degree
Prerequisite Courses
Again, PT school is a graduate level, doctorate degree, so upon graduation, your formal title is “Doctor of Physical Therapy.” It is not a PhD.
Picking the Right Major for Your Future
The undergrad years are essentially “prep time” for anyone who is PT school-bound (or Physician’s Assistant school or Med school, for that matter.) You’ll spend your first few years completing your general education courses, and then you’ll move on to any and all courses required for your declared major.
As far as PT school is concerned, certain undergraduate degrees will transfer better than others into a graduate-level physical therapy program. For instance, most of the required PT school courses are already built in to an Applied Health, Kinesiology or Athletic Training/Sports Medicine major. So, of those three, which should you pick?
Applied Health
Essentially, pre-med. Applied Health is a great major if you think you may be interested in becoming a nurse (can be a undergrad/grad combo), occupational therapist (Master’s Degree), physician assistant (Master’s Degree), or some other healthcare profession (e.g. pharmacology, radiology, etc.) Pro: you have so many options and opportunities for grad school! BUT, you do have to go on to grad school. Applied Health is pre-med—something else has to follow 🙂
Kinesiology
Kinesio is a bit more targeted in your professional career options, but the coursework is not as demanding as Applied Health (there’s less emphasis on the “hard sciences.”) This would be a good option if you think you may want to go into biotech, product development or prosthetic device/adaptive equipment design. You could also go into teaching at the high school-level, however this would require that you complete a credentialing program (another two years of schooling after undergrad.)
Athletic Training
The biggest advantage to completing an Athletic Training Education Program (ATEP) is the amount of on-field, clinical experience you get as a student. You are hands-on with athletes and patients from the start, learning valuable evaluation, assessment and treatment skills , plus you get to spend less time in the lab and more time on the field! Pros: When you graduate, you can start working (and getting paid!) right away; you can work with sports teams at the high school, college, or professional level, or you can work in a PT clinic, hospital, or sports performance facility. Many ATEP graduates take the national board exam to become certified athletic trainers, which is something I highly recommend as it makes you more desirable both as an employee and as a PT school applicant.
The overarching “pro” of all of these majors is that you know that the majority of PT school prerequisites are already built into your undergraduate degree. Just remember that there may be a few classes that you will need to take as electives.
Planning for Prerequisite Courses
Every PT school has its own prerequisite coursework listed as a part of their application criteria, so check those lists and make sure you take all the necessary classes to avoid having to take those classes after you graduate (i.e. at a local junior college) before being able to apply to grad school. The Physical Therapy Centralized Application Service (PTCAS) website is a good tool for researching the general classes required by the majority of PT Schools (e.g. Anatomy, Physiology, one year of Chemistry, one year of Physics, certain psychology classes, etc.) so get organized early to ensure you at least take these classes. However, don’t forget to also check the program websites for your PT School(s) of choice to see if they might require some additional coursework. For instance, some schools require Trigonometry, while others are satisfied with College Algebra, so make sure you check!
Actions Speak Louder than Transcripts
While signing up for the right class or major can boost your chances of making it into PT School, your attitude and actions will inevitably decide whether you get that doctorate degree or not. As someone who’s been down this path before, here are my last bits of personal advice for realizing your dream of becoming a licensed doctor of physical therapy.
Go the extra mile. PT school (well, graduate school in general) is getting more and more competitive! Take every opportunity to participate in research, internships, and volunteer opportunities to make yourself a more desirable candidate.
Be memorable and recommendable. You will need letters of recommendation from your professors and employers when applying to PT school, so earn them! Work hard, network, and stand out (in a good way.)
Act with your future in mind.In any healthcare field you must qualify for licensure, and all accrediting/licensing bodies—federal and state—will perform thorough background checks. Drug and alcohol use/violations, such as DUIs, are not taken lightly and can delay or even prevent you from receiving your license. Have fun in college, be “well-rounded,” but DON’T be stupid.
Think before you post. In our current time of social media, it’s good to remember that what happens on the internet, stays on the internet (Yes, even Snap Chat!) Trust me, I didn’t just make this up, I have friends in high tech places who will tell you that everything on the internet lives forever. Is it your dream to be a licensed doctor of physical therapy? Then keep that in mind when posting on social media.
Jessica Snyder (PT, DPT, ATC, CSCS) received her Doctor of Physical Therapy degree at the University of St Augustine for Health Sciences – with an emphasis on orthopedics, movement science, and manual therapy. Jessica started her career as a Certified Athletic Trainer working with high school, college and professional athletes. She is also a Certified Strength and Conditioning Specialist (enhancing her ability to build custom strength, stability and performance-centered rehabilitation and return-to-sport programs) and Certified Natural Running Coach. Being a runner herself, Jessica specializes in running-related injuries, including the entire lower extremity. She is also passionate about treating headaches and neck/shoulder pain.
A college running injury is what originally introduced me to the field of physical therapy. I remember being so frustrated that I could not run and no one seemed able to “fix” it. I was bounced around between the university’s medical staff with no resolution. It wasn’t their fault; they had a lot of athletes to cover and I simply fell through the cracks. But, I was also extremely stubborn and continued running. In pain. Because no one had a better solution.
It was finally my mom who intervened. She did some research and found a physical therapist that she thought could help me. The physical therapist was the first person who took the time to listen to my symptoms, evaluate my injury, and explain to me what was going on and what needed to be done in order to get me running again. Finally! A diagnosis, an explanation, and a plan.
That’s when I knew I wanted to become a physical therapist.
On Top of the World
When I received my doctorate of physical therapy degree, I couldn’t help but think about how I’d come full circle—how I was now going to be that person that helps someone get back to doing what they love. I felt so grateful that this is what I was going to do with my life.
Flash forward, and I’ve now been working at Rausch Physical Therapy & Sports Performance for four years. I still run daily, and I haven’t really had to deal with any of the major, sidelining injuries that plagued me back in college. I’ll admit that I started to lose sight of PT from the perspective of a patient. It took a recent personal injury to remind me why I love this field so much.
Last month I was snowboarding at June Mountain when I fell on my butt and completely threw out my SI joint. That’s when I got my worst patient of all time: Me.
The Fall
I couldn’t walk, let alone run. Getting in-and-out of the car was terrible. I couldn’t bend down to wash off the dog’s muddy paws, and I also couldn’t mop up the floor. I couldn’t even chase after my best friend’s daughter when she took off running towards the street—half a step and shooting pain across my back.
At first, I was okay with it. As a PT, I was able to self-diagnose myself with a badly sprained SI joint, which I knew would require time for the inflammation to go down and scar tissue to form in order to stabilize it. But, this professional practicality quickly faded into personal distress. By the end of the first week, I was in the anger phase of my depression. I was constantly on the verge of tears, I was ready to give up trying to stay active, I had even convinced myself that I would never run again (Completely irrational! It had only been a week!)
Then, something amazing happened. One of my favorite parts of being a PT is chatting with my patients while I’m treating them, and inevitably my frustration with my injury came up. That’s when my patients started repeating all the things that I had at some point told them during their recovery:
“Jessica, you know tissue healing takes a minimum of four weeks.”
“Be patient, Jess! Why don’t you take this time to focus on strengthening?”
“Allow your body to heal properly; you don’t want to push it too early and create a chronic problem.”
I was transported back to that time in college, when someone was able to pull me out of my injury-induced spiral when I felt hopeless. But this time, that person was myself! Coming through my incredible patients! I was so grateful for their explanations and words of encouragement, and I was finally able to tell myself, “Pull it together and stop acting crazy!”
Getting Back Up
So, I made a plan. I started to focus on what I could do, and used this injury as an opportunity to be more creative with my exercise routine. I started to be grateful for the little things that I was slowly able to do, walk with less pain, finally lie down on my back, and almost lift my foot to put on a shoe.
Recovery is a process. As a patient, I think it’s important to know that your physical therapist has chosen their professional field for a reason: we’ve been there, we get it, and thanks to this recent fall of mine, I am more motivated than ever to get you back to feeling your best.
Jessica Snyder (PT, DPT, ATC, CSCS) received her Doctor of Physical Therapy degree at the University of St Augustine for Health Sciences – with an emphasis on orthopedics, movement science, and manual therapy. Jessica started her career as a Certified Athletic Trainer working with high school, college and professional athletes. She is also a Certified Strength and Conditioning Specialist (enhancing her ability to build custom strength, stability and performance-centered rehabilitation and return-to-sport programs) and Certified Natural Running Coach. Being a runner herself, Jessica specializes in running-related injuries, including the entire lower extremity. She is also passionate about treating headaches and neck/shoulder pain.
Remember that game Twister? Every time that spinner landed on a new color, you were forced to reach your hand behind your back, underneath a leg, and across the board, all while trying not to fall. While incredibly entertaining, this silly gamecan also be a valuable lesson about positional torques, balance, rotation and flexibility—especially when it comes to baseball.
Looking at the specific qualities to win this game can be related to the critical components of the throwing motion in baseball. Often times when assessing a pitcher’s mechanics, there’s a miss in relating the lower half to the upper half of the body.It is crucial for a pitcher—no matter the age—to begin to learn the importance of max hip rotation in order to achieve full torque of the trunk and obtain maximal velocity through the pitch.
The Sling Shot Effect
The rubber band of a sling shot is wound up with so much tension so that when it’s released, a massive amount of kinetic energy hurls the rock (or projectile of your choice) forward. The pitching motion in baseball is similar in that the lower half of the body, starting with proper foot placement and maximal hip rotation, will create a buildup of kinetic energy through the trunk, shoulder blades, shoulder and finally release through the fingers.
Proper Hip Rotation and How to Get It
Without proper hip rotation, a pitcher’s hips will fly open, which creates torque at the elbow. To avoid this, we want proper hip rotation, which occurs when:
The hips are fully rotated just before the lead foot strikes the ground
The shoulders are closed with arm extended out into the cocked phase of throwing.
Proper rotation allows for maximal hip-to-shoulder separation, which in turns creates the most amount of torque and velocity possible. There are two specific keys to obtaining this position and preventing further stress on the arm, the lead leg and posture.
The lead leg
The lead leg must be relaxed from the knee down and have proper landing position. Proper landing position includes:
Toes pointing slightly towards the right-handers box (if a right-handed pitcher.)
The hips will remain closed until just before lead foot strikes the ground.
At this time they will lead their front hip towards the plate and really turn open the front hip at the latest possible time.
If done properly, the pitcher shoulder feel tightness along their oblique muscles, NOT their back.
Posture
When a pitcher transitions from early-stance phase to the cocked position, their posture can completely affect their ability to rotate through their hips and finish off a throw. For example, if a pitcher is bent too far forward when their foot lands, they will not have the ability to achieve full pelvic rotation, thus not allowing this maximal hip/shoulder separation.
The key for good throwing posture is to focus on balancing and creating extension or back-bending through the middle part of the athlete’s back. It has been statistically proven and correlated that the optimal position of posture is the thoracic spine slightly extended, slight lean towards the back leg, and non-throwing hip flexed up. Therefore, it is important to not allow early rotation of the trunk or shift the center of gravity towards the throwing arm, as both will cause the trunk and shoulders to “open early.” before the hips, and create abnormal stresses on the shoulder and arm.
Maintaining proper foot landing position and rotation of the hips will create the maximal amount of separation leading to good pitching mechanics and increased velocity. Posture is also considerably important and must be taken into account when looking at the ability to create this hip to shoulder separation.
Jonathan Meltzer graduated from the University of Redlands with a bachelor of arts in biology and a minor in physical education. Following graduation, Jonathan discovered his passion for physical therapy while working as a Physical Therapy Aide. After graduating top of his class from Loma Linda University in 2012 with a Doctorate in Physical Therapy, Jonathan began his career at Rausch Physical Therapy and Sports Performance. Jonathan’s goals are to identify limitations and treat his patients with the most recent and innovative techniques in order to maximize functional independence and obtain his patients’ individual goals.


 Dustin Hancock, DPT graduated from San Diego State University with a bachelor’s degree in kinesiology/nutrition. He went on to receive his doctorate in physical therapy in 2011 from University of St. Augustine, and began his career at